Posted on — Leave a comment

EN-EL25 Compatibility Chart: 4 Bodies and the Models That Do Not Fit

The EN-EL25 covers 4 bodies, from the Z30 to the Z fc; the most common buying mistake is not capacity but boundary cases such as Z5 / Z6 / Z7 → EN-EL15. The table below lists every compatible body by series, followed by the models that take a different cell. Always trust the marking on the camera or in the battery compartment: similar-looking packs are not necessarily interchangeable, and EN-EL25 / 7.6 V should still be checked against the contacts and firmware of your body.

By CIPA standard the Z50 delivers about 320 shots per charge (Z fc 300 / 4K 75 min). Real-world figures fall with viewfinder use, bursts, flash and low temperature, so budgeting around 70% of the rating is safer.

Full compatibility list

All 4 bodies below accept the EN-EL25 or a cell from the same family, grouped by series. “Compatible” means the compartment and contacts match; it does not guarantee that older bodies can exploit the full capacity of a high-capacity pack.

Body Body Body Body
Z30 Z50 Z50 II Z fc

Which models do not fit

This is where search results most often mislead. Packs with similar names and near-identical shells frequently belong to entirely different systems, and forcing one in can damage the compartment.

Item Value
EN-EL25 EN-EL25 / 7.6 V
EN-EL25 Nikon EN-EL25
en-el25 1350 mAh / 10.26 Wh
Z50 320 / Z fc 300 / 4K 75 min
Z5 / Z6 / Z7 → EN-EL15 EN-EL25 / 7.6 V
EN-EL25 / 7.6 V 1350 mAh / 10.26 Wh

How to check before ordering

The reliable check is the model printed on the bottom of the body or inside the battery compartment, matched against this list. On a used camera, also confirm that a previous owner has not swapped the battery door.

To pick by model, start with the specifications and stock status on Nikon EN-EL25 1350mAh, then browse the full article set in EN-EL25; if your body belongs to a neighbouring system, EN-EL15 has the side-by-side explanation.

FAQ

How many bodies take the EN-EL25?

Our list contains 4 bodies, from the Z30 to the Z fc. It is grouped by series, but still check the body marking, since a later generation in the same line can switch cells.

Is the EN-EL25 interchangeable with neighbouring models?

EN-EL25 / 7.6 V shares one shell and contact layout, so those cells fit each other. However, Z5 / Z6 / Z7 → EN-EL15, and those bodies need their own cell — never judge by shape alone.

Will every body on the list benefit from higher capacity?

All of them run normally, but older bodies set their cutoff and fuel gauge to the original specification, so extra shots do not scale linearly and the percentage may read conservatively.

How do I confirm which cell to buy?

Read the model on the bottom plate or inside the battery compartment and match it against this list. If the marking includes a suffix or a “for use with” note, follow the manual rather than the capacity figure.

Posted on — Leave a comment

A Swollen NP-FZ100 — Can You Still Use It? Causes and Safe Handling

Direct answer: a swollen NP-FZ100 is done. Don’t use it, and don’t charge it. Swelling means gas has formed inside the cell and the internal structure is no longer stable. Further charging or discharging risks more expansion, leaking, or thermal runaway. The correct response is to stop using it, insulate the terminals, store it alone, and hand it over to a battery or hazardous waste collection point. The price of one pack is far below the cost of one incident, and this isn’t a place for optimism.

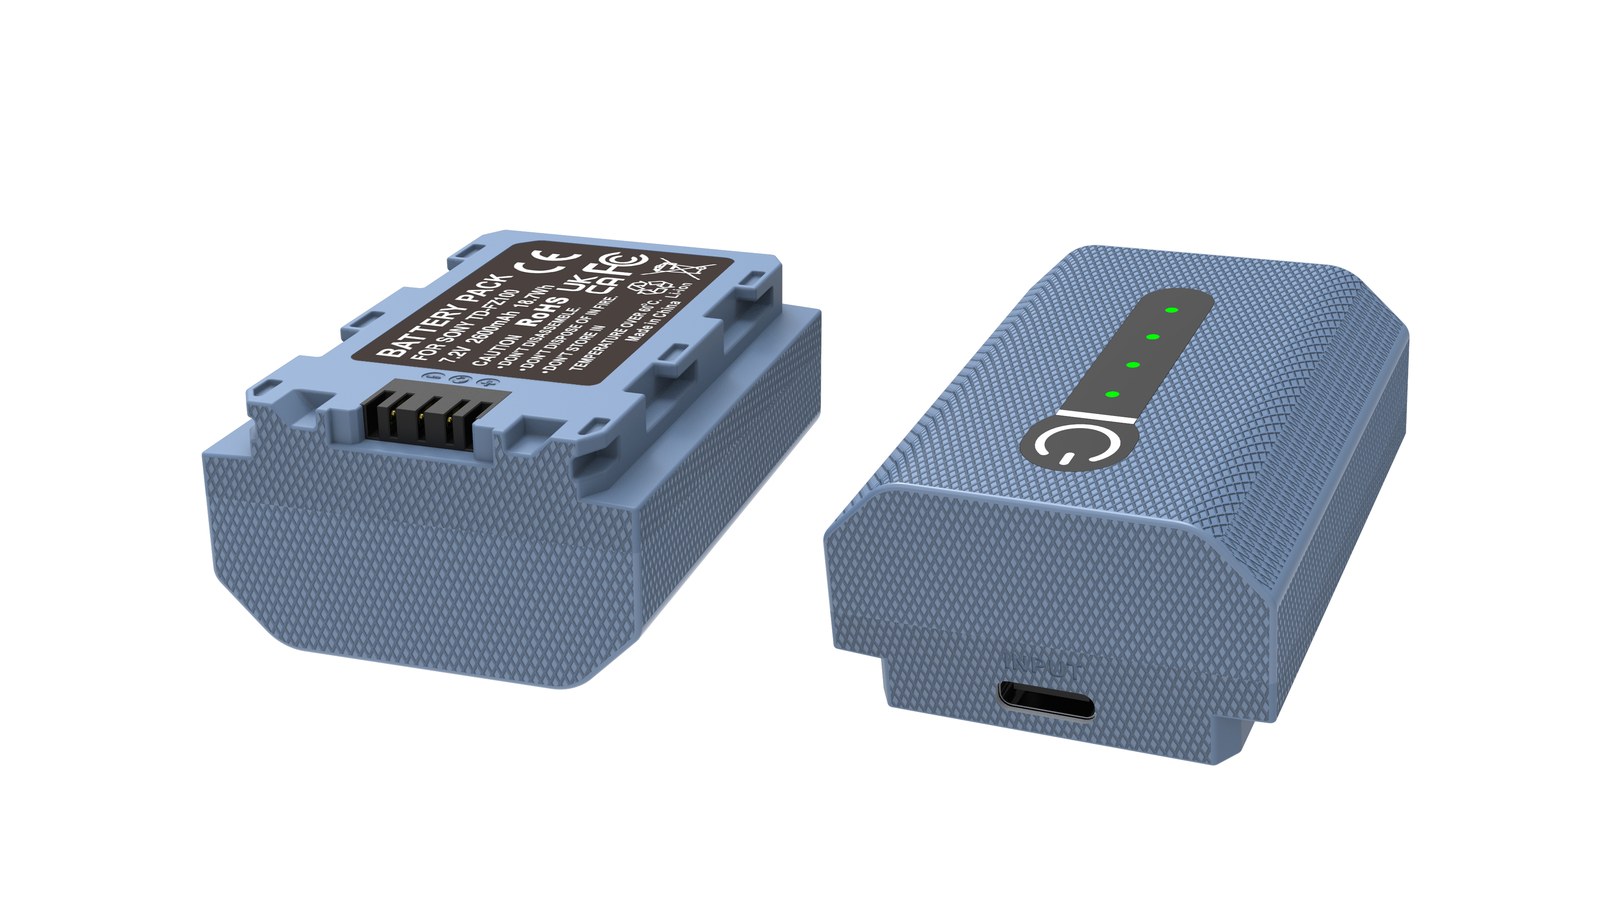
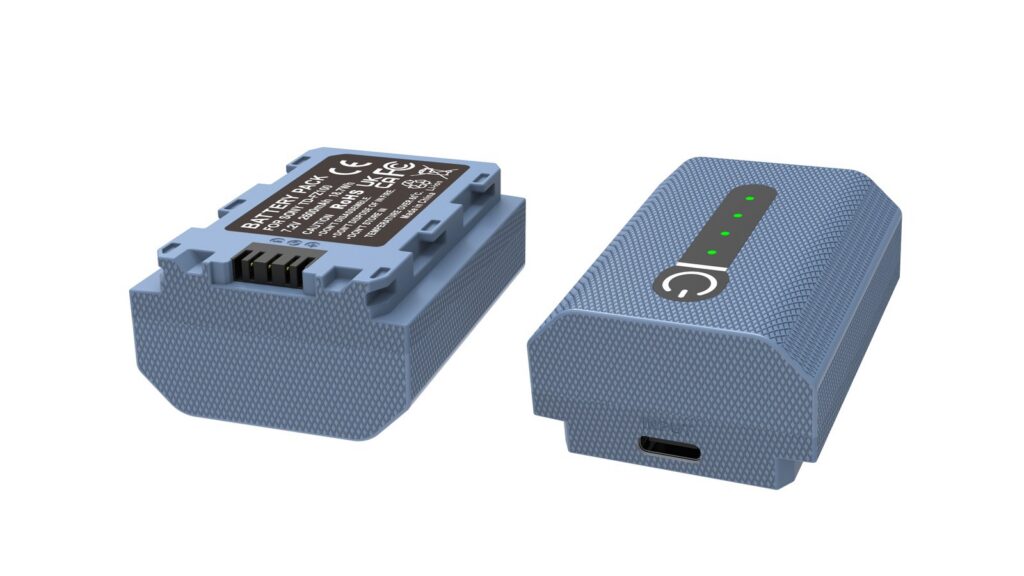
YO NP-FZ100 camera battery render
Product render of the YO NP-FZ100 compatible battery: front label, rear LED charge indicator and USB-C port.

How to tell whether it’s swollen

Mild swelling isn’t always obvious to the eye. These checks will confirm it:

  • The spin test. Set the pack on a flat table or a piece of glass and give it a gentle push. If it spins or rocks freely, the underside is no longer flat.
  • Look at the seam. Is the case seam opened up, or do the sides bulge so the middle sits higher than the edges?
  • How it fits. Noticeably tight going into the compartment, sticking on the way out, or a battery door that won’t close properly.
  • How it feels. A hollow or slightly springy feel under light finger pressure, instead of the solid feel of a healthy pack.
  • Companion symptoms. Sudden capacity loss, clear heat while charging, or the level jumping — all possible signs of internal trouble.

Any one of these is enough. Treat it as swollen and don’t wait for it to get more obvious.

Why packs swell

Cause What happens Preventable
Overcharging or failed charge control Long overcharge, or a charger that doesn’t match the spec Yes
Short circuit Terminals touching metal, or an internal micro-short Yes
High temperature A car in summer sun, or long storage beside a radiator Yes
Stored at full charge Full charge plus heat accelerates gas formation Yes
Deep over-discharge Left unused without top-ups, cells take damage Yes
Normal aging Wear sets in after roughly 300–500 cycles Only slowed
Physical damage Drops, crushing, puncture Yes

Almost every cause traces back to use and storage habits. Even a dropped pack that looks fine deserves an observation period before you trust it on paid work.

What to do once you find one

  • Step 1: stop using it. No camera, no charging, and don’t try to drain it.
  • Step 2: remove it. If it’s stuck in the compartment, don’t pry or force it — rock gently or use tape to pull, without squeezing the cell.
  • Step 3: insulate the terminals. Tape over the contacts, or use the original packaging or a cap, so they can’t meet keys or coins.
  • Step 4: store it alone. Dry, cool and away from anything flammable. Don’t stack it with other packs.
  • Step 5: never puncture, crush or burn it. All of these can start a fire. Don’t put it in general trash either.
  • Step 6: take it to a collection point. Hazardous waste facilities, electronics markets and retailer battery drop-offs, following local rules.
  • Step 7: check the rest of the batch. Inspect other packs from the same set and the same charger, and retire them together if needed.

If a pack is smoking, clearly hot or smelling, move people and flammables away, keep the area ventilated and follow local emergency guidance.

Preventing the next one

  • Use a charger that matches the spec on voltage and interface. Cheap chargers without protection circuitry carry more risk.
  • Avoid sitting at full charge. If you’re not shooting for a few days, bring packs down to 40–60% rather than leaving them on the charger.
  • Control temperature. Store around 15–25°C. No packs in a sunlit car, none beside a heater.
  • Avoid over-discharge. Top up every three months in storage — see charging cycles and storage basics.
  • Prevent shorts. Terminal covers or individual slots; no loose packs sharing space with metal objects.
  • Don’t drop or crush them. Keep batteries in their own pouch, not under heavy gear at the bottom of a bag.
  • Inspect routinely. A glance at each pack before and after a shoot catches problems early.

More on third-party pack safety in are aftermarket camera batteries safe; if the pack also shows recognition errors, the recognition troubleshooting steps applies.

FAQ

Can I keep using a slightly swollen pack for a while?

We wouldn’t. Swelling is irreversible and progresses unpredictably — especially not on a job that matters.

Can I fly with a swollen battery?

No. Lithium cells in an abnormal condition aren’t permitted on aircraft, in the cabin or in checked bags. Dispose of it through a collection point instead.

Can I release the gas and carry on?

No. Puncturing or squeezing to vent gas destroys the internal structure and can cause a short and a fire. It’s a dangerous maneuver — never try it.

How do I tell swelling apart from a normal curved case?

A healthy pack sits flat and doesn’t rock on a tabletop. The spin test answers it in a second; if it rocks, treat it as swollen.

Two charging options, same capacity: standard 2600mAh (dock required) or USB-C 2600mAh (phone charger or power bank). Pick the version on the NP-FZ100 product page; bulk pricing via wholesale.

Posted on — Leave a comment

Camera Shuts Down and Runtime Collapsed: Is Your NP-FZ100 Worn Out?

When a body starts shutting down and a full pack lasts half as long as it used to, the usual cause is an aged battery, with body settings and environment coming second. Work in this order: rule out settings and environment first, run one full cycle to recalibrate the gauge, then swap in a known-good pack to see which side the problem sits on. If several packs all run short in the same body, look at the body. If only one pack runs short, that pack has aged.

YO NP-FZ100 camera battery render
Product render of the YO NP-FZ100 compatible battery: front label, rear LED charge indicator and USB-C port.

Rule Out Three Non-Ageing Causes First

  • Cold: capacity drops noticeably below freezing, and around -10°C you may get roughly half of what you would at room temperature. Fast drain in winter usually recovers once the pack warms up; the coping strategy is in winter runtime.
  • Power-hungry settings: a bright screen for composing, burst shooting, 4K recording, constant autofocus and playback all raise draw, so the frame count falls accordingly. Drop the screen brightness and cut playback for a day and see whether the numbers come back.
  • An inaccurate gauge: a jumping percentage makes it look like runtime collapsed. Do one full charge-and-discharge cycle before you judge anything; the method is in calibrating the charge display.

Six Signs of an Aged Pack

Symptom Likelihood of ageing What it means
Drops to one bar after a few dozen frames from full High Usable capacity is well below the rating
Jumps from two bars straight to shutdown High Discharge curve collapses at the end; resistance is up
Cuts out at power-on or during a burst High Voltage sags under load and trips protection
Runs clearly hotter than packs from the same batch Medium-high Rising resistance produces more heat
Charges suspiciously fast, then dies just as fast High It is accepting less energy in the first place
Swollen or deformed shell Safety issue Stop using it and handle it as a safety issue

Note how the first, third and fifth rows combine. A pack that charges fast, empties fast and runs hot is aged, and you can treat that as settled.

How to Locate the Problem With a Swap Test

  • Swap the pack: fit a known-good battery into the same body. If runtime returns to normal, the original pack was the problem.
  • Swap the body: put the suspect pack into another body of the same model. If it still runs short, it is the pack.
  • Change the conditions: test indoors at room temperature with the power-hungry settings off, to remove cold and settings from the equation.
  • Count frames: log the shot count for two packs across the same outing. A written comparison beats an impression.

You do not need to-the-frame precision. You only need to see whether one pack is clearly behind the other. Official CIPA figures usually sit in the 500–700 frame range, while real-world use commonly lands closer to 60–80% of the rating, and lower again for video and bursts.

How Much Life Is Left: The Ageing Curve

Lithium cells typically retain around 80% of their capacity after 300–500 cycles, so “shorter after a year” is expected rather than alarming, and by roughly the two-year mark replacement deserves serious thought. Charging two or three times a week puts most people at that point somewhere between a year and a half and two years; heavier users arrive sooner. The full curve is laid out in capacity loss and replacement timing.

Situations Where You Should Just Replace It

  • Ahead of a wedding, commercial shoot or trip, when one pack is clearly underperforming.
  • Shutdowns during bursts or recording that have already cost you frames.
  • Obvious heat while charging, or any swelling in the shell.
  • Two-plus years of service, or cycle count approaching 300–500.

Heavy users should keep at least two packs in rotation so no single pack becomes the single point of failure in a shoot.

Habits That Slow Ageing

  • Top up opportunistically rather than running to zero. Frequent deep discharge is hard on cells.
  • Store long-term at roughly 40–60% charge, cool and dry at about 15–25°C, with a top-up every three months.
  • Avoid leaving packs at 100%, especially in a hot place.
  • Number your packs and rotate them, so none sits idle long enough to self-discharge into trouble.
  • Keep terminals clean and dry. Wipe them down after coastal or wet shoots.

FAQ

It shuts down, then powers back up showing charge. Is the pack dead?

Probably aged. Start-up and burst shooting draw high current; voltage sags under that load and trips protection, then recovers once the pack rests. That rebound is a classic ageing signature.

Can a new pack shut the camera down too?

Yes, under high load in burst or 4K, or in the cold. Warm it up and retest at lower load. If it still cuts out in normal conditions, contact the seller.

Will recalibration bring capacity back?

No. A full cycle improves the accuracy of the display, not the energy the cell holds. If the real frame count is still short afterwards, the cell has genuinely degraded.

Can the body itself cause shutdowns?

It can. Firmware glitches, a heavy lens focus motor, or heat protection in hot weather can all shut a body down. Use the swap test to separate the two.

Only need a spare? The NP-FZ100 2600mAh comes on its own, with a charger, or as a two-battery kit. Both versions hold 2600mAh; the USB-C one costs slightly more and saves you carrying a dock.

Posted on — Leave a comment

How to charge an EN-EL14: four methods and realistic times

Short answer: on these DSLRs the body does not charge the battery at all, so a dock charger is the whole story.The original MH-24 dock is the least fuss, while a third-party USB dock is cheaper and more universal. Divide the 8.07Wh in the pack by the power that actually reaches it and a 5W-class supply needs about two hours, a 10W-class supply a little over one, with the tail of the charge and cable losses accounting for the rest.

YO EN-EL14 battery rating label
Rating label of the YO EN-EL14 battery: nominal voltage, typical capacity and safety certifications.

First, check whether your body charges at all

This is where most people go wrong. On the D3100 through D3500 and the D5100 through D5600, the USB port is for data transfer. It cannot charge the battery inside the camera. The box contains an MH-24 dock, and charging means taking the pack out.

The Df follows the same pattern. The Coolpix P7000, P7100, P7700 and P7800 are compact cameras, and some of them do accept USB charging of the internal pack. Check the manual for your specific model rather than assuming the whole family behaves alike.

In other words, for almost every EN-EL14 owner, how do I charge this is really which dock should I use.

Four methods, estimated times

The arithmetic is simple. Take the pack’s 8.07Wh typical rating (7.70Wh nominal) and divide by the power reaching the cell. A charger labelled 5W or 10W is quoting input power, and conversion plus cable losses eat part of it, so the figures below assume about 80 percent efficiency. They are estimates, not manufacturer ratings.

Method Rough time (estimate) Who it suits
In-body USB charging Only some Coolpix models; about 2 hours at a 5V/1A level Travelling with the body only and topping up briefly
Original MH-24 dock About 1 hour at roughly 8W input; realistically 1.5 to 2 hours with the tapering tail Charging at home or in a hotel, rotating two packs
Third-party USB dock (5V/1A) 8.07 ÷ (5×0.8) ≈ 2 hours Budget setups and travel spares
Third-party USB dock (5V/2A) 8.07 ÷ (10×0.8) ≈ 1 hour Faster turnaround when a multi-port charger is already on hand
Power bank plus USB dock Depends on the bank: about 2 hours at 5V/1A, about 1 hour at 5V/2A Outdoor shoots, travel, venues without mains power

The numbers are for scale, not stopwatch accuracy. Three things stretch them: current tapering at the end of the cycle, losses in the cable and connector, and a protection board that limits current when the pack is cold.

Choosing between them

At a fixed base, the original dock is the least effort. Put the pack in and walk away. Its contact layout and detection logic match the pack, so compatibility is not a question.

For frequent travel, a 5V/2A third-party USB dock plus a multi-port charger weighs less than the original dock and charges a phone at the same time. Check that the metal pins line up with the EN-EL14 terminals before buying. A misaligned or reversed insertion shows up as a blinking light and no charge.

Outdoors and on long trips, a power bank with a USB dock is the only practical option. The conversion is easy. A 10000mAh bank is roughly 37Wh, so four full charges are theoretically possible, and planning on three is sensible once losses are counted.

What to avoid: unbranded chargers, charging in a car parked in the sun, and leaving a pack on the charger every night. These are general cautions rather than problems unique to this pack, but swollen cells usually trace back to this kind of use.

Small habits that extend pack life

  • For the first two or three cycles, charge until the indicator goes out. No need to drain it flat first.
  • For long storage, keep roughly half a charge and top it up every three months.
  • Charge near room temperature. In winter, let a cold pack sit for a while before putting it on the dock.
  • Rotate two packs rather than running one through constant cycles.

If you do not yet have a second pack, the EN-EL14+ compatible battery is rated 1090mAh at 7.4V and 8.07Wh, a little below the roughly 1230mAh of the original EN-EL14a, so plan spare capacity with that gap in mind. The body list is in the Nikon EN-EL14 series category.

FAQ

Can I charge an EN-EL14 with a phone charger?

Yes, as long as a USB dock sits in between. The phone charger only supplies power. Whether charging happens depends on the dock’s pin positions and detection circuit. A 5V/2A charger is faster than 5V/1A, but not twice as fast, because the battery-side management is the bottleneck.

Will an original MH-24 charge a third-party EN-EL14+?

Normally yes. The MH-24 judges charge state from voltage and temperature rather than a complex handshake. If the shell shape and contacts match, it will charge, though the indicator may behave slightly differently from an original pack.

Is a warm battery normal during charging?

Warm is normal, hot is not. Heat concentrated in the middle of the pack that feels merely warm is within normal range. If the shell becomes hot to the touch or starts to deform, stop using it immediately.

Can I leave it charging overnight?

A dock usually drops to a trickle or stops when the pack is full, so an occasional night is not a problem. Doing it every night brings no benefit. Charging during the day and unplugging when done is the safer habit.

Posted on — Leave a comment

New NP-FZ100 Won’t Fit or Feels Too Tight: A 6-Step Fix

A new NP-FZ100 that refuses to go in is rarely a dead battery. In most cases it is one of three things: wrong model, wrong orientation, or a protective film still on the terminals. Start by confirming the body belongs to the FZ100 family. A7 III, A7R III/IV/V, A7 IV, A7S III, the A9 series, A1, A6600, A6700, the A7C series, FX3, FX30 and ZV-E1 all run on this pack. A6400, A6500, A6300, A7 II, A7R II and A7S II take the NP-FW50, which looks broadly similar but physically will not seat. Once the model is right, work through orientation, latch, then contacts. Most cases resolve in a minute or two. Do not press hard.

YO NP-FZ100 camera battery render
Product render of the YO NP-FZ100 compatible battery: front label, rear LED charge indicator and USB-C port.

Step 1: Make Sure You Bought an NP-FZ100

This is the most common cause. Plenty of orders get placed under a generic “Sony mirrorless battery” listing and arrive as an FW50 or a BX1. The three families differ in size, capacity and latch position, and they cannot be swapped. The full cross-reference lives in Sony mirrorless battery comparison chart, and the body-by-body list is in every camera that takes the NP-FZ100.

  • NP-FZ100: most full-frame and flagship bodies from the A7 III onward, rated around 2600mAh / 7.4V / 19.24Wh.
  • NP-FW50: earlier bodies such as the A6000, A6300, A6400, A6500, A7, A7 II, A7R II and A7S II.
  • NP-BX1: compact cameras like the RX100 series.

One more naming trap worth knowing: NP-FZ100 (USB-C) is the 2600mAh variant. Its shell and latch are identical, so it drops into the same bodies — the difference is the cell rating, not the fit.

Step 2: Check Orientation and Latch Position

The NP-FZ100 is directional. The front face usually carries an arrow or a body diagram; the terminal side goes inward, and the side with the latch notch lines up with the spring catch inside the compartment.

  • Open the compartment door fully and look at which way the contacts inside face.
  • Terminals inward, label outward. Push straight along the rails, not at an angle.
  • You should hear a faint click at the end of travel — that is the catch engaging.
  • If the tail of the pack sits proud, it is not seated. Take it out and start over rather than closing the door against it.

Reversed, the pack simply will not go in. That is the point to stop pushing: forcing it can bend the spring contact in the compartment or scratch the terminal plating.

Step 3: Check for Terminal Film and Packaging Residue

Some packs ship with a thin transparent film or plastic strip over the terminals for short-circuit protection. It is close in colour to the contacts and easy to miss. Hold the pack up to the light before loading and confirm the metal is fully exposed, with no film and no adhesive residue. Film in place means no power, and the body may report that it cannot read the battery.

Step 4: When the Latch Feels Too Tight

A fresh pack with tight shell and latch tolerances is normal, and it usually loosens up after a few cycles.

  • To insert: push the pack all the way in, press with the flat of your finger near the tail by the latch, and release once you hear the click.
  • To remove: flick the release lever inside the compartment first. The pack will lift slightly on its own, then pinch and pull it out. Do not dig into the side of the pack and yank.
  • Door will not close: the pack is not seated. Take it out, reload it, and check the compartment for debris or a bent spring.
  • If the catch is genuinely stiff, a trace of dry lubricant on the plastic edges away from the terminals can help. Work it in with a few insert-and-remove cycles. Keep it off the contacts.

Step 5: Inspect the Pack and the Compartment

Look over the shell for swelling, deformation or flashing on the moulding, and check whether the terminals sit straight. Then look inside the compartment for debris and for a spring contact that is bent or loose. A swollen pack must never be forced in — set it aside and handle it as a safety issue. A visibly deformed spring is a body-side fault and belongs in a service centre, not in a battery replacement.

Three Checks Once It Is In

  • Power on and confirm the charge indicator appears normally instead of a “cannot be used” message.
  • Fire off a few frames and check that playback is clean.
  • Charge it fully before the first outing rather than heading out on shipping charge.

If a full pack drains quickly, or the gauge drops from two bars straight to shutdown, a full charge-and-discharge recalibration usually helps. The procedure is in fixing an inaccurate charge display.

FAQ

The pack goes in but will not latch and pops out when touched

Usually the catch has not engaged, or the compartment catch is worn. Make sure you push to the end and hear the click. If it keeps happening, check the latch notch on the pack for flashing and ask the seller for a replacement if needed.

It is in but the camera does nothing — is it reversed?

Reversed, it would not have gone in. No power at all is more likely film on the terminals, dirty contacts or a flat pack. Charge it, wipe the contacts with a dry cloth, and try again before assuming a fault.

I forced it once. Can that damage the camera?

One light squeeze is unlikely to cause damage, but check the compartment contacts for deformation and the pack shell for cracks. Watch for “not recognised” messages or odd shutdowns over the next few shoots.

I have two packs and one is smooth while the other is tight

Batch tolerances vary and that is normal. The tighter one usually improves with use. As long as it latches and delivers stable power, it is fine.

Only need a spare? The NP-FZ100 2600mAh comes on its own, with a charger, or as a two-battery kit. Both versions hold 2600mAh; the USB-C one costs slightly more and saves you carrying a dock.

Posted on — Leave a comment

NP-W235 Ageing and Troubleshooting: Swelling, Fast Drain and Not Recognised

Most “dead” NP-W235 packs are really dirty contacts, cold cells or normal ageing. Run three quick checks before buying a replacement. Batteries are consumables. As cycle count rises, internal resistance increases and the pack shows full charge for less time, or shuts down abruptly in the cold. Work in order: clean the contacts, retest in a second body, then log the shot count from three full charges.

By CIPA standard the X-T5 delivers about 580 shots per charge (X-H2S 1.5 h). Real-world figures fall with viewfinder use, bursts, flash and low temperature, so budgeting around 70% of the rating is safer.

Symptom checklist

The table lists four symptoms by how often they occur. In most cases a replacement is not yet necessary; rule out contact and temperature factors first.

Symptom Likely cause What to do
Full charge drops to low very quickly Oxidised contacts or an aged cell Clean the contacts, retest in another body, then log full-charge shots
Body reports "cannot recognise this battery" Third-party decoding mismatch or dirty contacts Wipe and reseat; if it persists, test with an original-spec cell
Shuts down suddenly in the cold Higher internal resistance causes a voltage dip Keep spares warm in an inner pocket and retest at room temperature
Shell bulges or the pack runs hot Overcharge, hot storage or aged cells Stop using it immediately and recycle under local rules

A three-step diagnosis

Step one: wipe the contacts with a dry soft cloth and reseat the pack. Step two: retest in a second body from the same family. Step three: log the shot count from three full charges to separate real ageing from a bad gauge.

Item Value
NP-W235 NP-W235
NP-W235 2200 mAh / 16.2 Wh
np-w235 2600 mAh / 19.24 Wh
X-T5 580 / X-H2S 1.5 h
X-T3 / X-T2 / X-T1 → NP-W126S NP-W235
NP-W235 2600 mAh / 19.24 Wh

When to replace the pack

Replace the pack when full-charge shots fall below about 60% of a new cell, the shell bulges, or the body repeatedly refuses to recognise it. Stop using a swollen cell immediately and recycle it properly.

To pick by model, start with the specifications and stock status on Fujifilm NP-W235 2600mAh, then browse the full article set in NP-W235; if your body belongs to a neighbouring system, fujifilm-np-w126s has the side-by-side explanation.

FAQ

Does a jumping charge level mean the NP-W235 is dead?

Not necessarily. Clean the contacts, retest in a second body, then log the shot count from three full charges. Only a sustained drop in shots points to real cell ageing.

What if the camera says the battery is not recognised?

Dirty contacts or a third-party decoding mismatch are the usual causes. Wipe and reseat the pack; if it persists, test with an original-spec cell to separate a battery fault from a body fault.

Is fast drain in winter normal?

Yes. Cold raises internal resistance and causes a momentary voltage drop. Keeping spares in an inner pocket helps considerably, and capacity normally returns at room temperature.

When must the cell be replaced?

Replace it when full-charge shots drop below about 60% of a new cell, the shell bulges, it gets unusually hot while charging, or it is repeatedly not recognised. Never squeeze, puncture or recharge a swollen pack.

Posted on — Leave a comment

Mixing One Original LP-E17 With Two 750mAh Batteries: Order

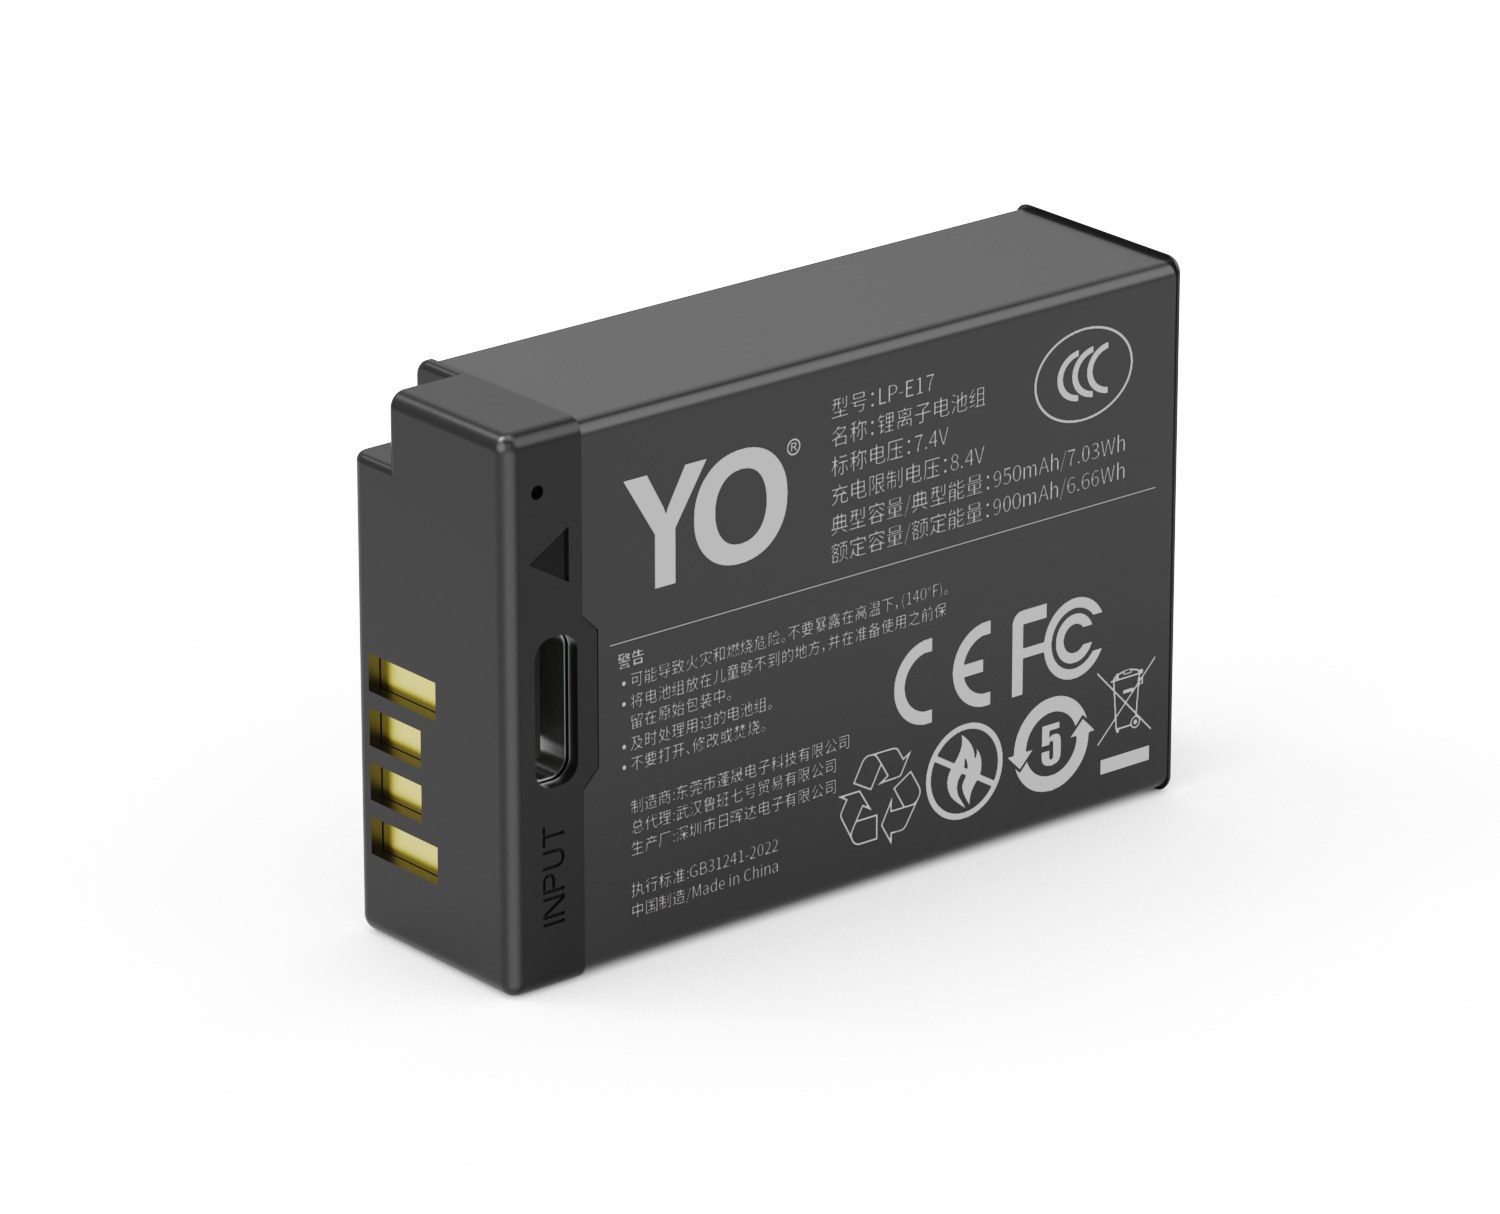
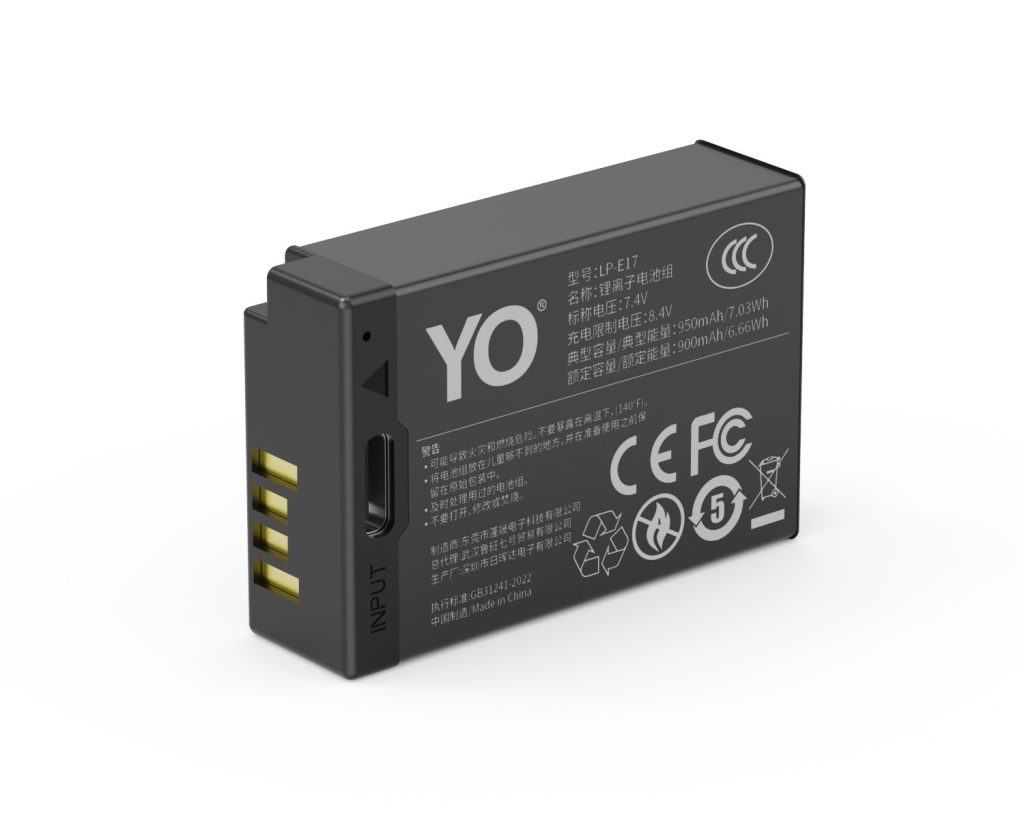
YO LP-E17 相机电池

Short answer: yes, you can mix them, and the rule is to run the small batteries first and save the most reliable one for last. An original LP-E17 is rated around 1040mAh and each 750mAh battery holds roughly seven tenths of that, so the trio adds up to about two and a half times an original battery, enough for most full days. What needs planning is not whether mixing works but which battery goes in when, because the moment of the swap affects the shooting rhythm more than the battery does.

YO LP-E17 camera battery render
Product render of the YO LP-E17 compatible battery: front label, rear LED charge indicator and USB-C port.

Mixing works because the voltage spec of the LP-E17 is fixed. The camera body identifies a battery by voltage and communication, not by capacity, so all three are equals inside the body. The only difference is how long each one lasts.

Why run the small batteries first

Two reasons. First, lithium-ion batteries self-discharge, and the longer a full battery sits the less usable charge remains. A small battery can only contribute so much absolute energy whenever you use it, so using it early compresses the window in which that loss happens. Second, the second half of a shoot is when energy and attention are lowest, which is exactly when you want a battery you can fit and forget. Saving the largest battery for that slot makes more sense.

The reverse order, original first and small batteries last, is not wrong; it simply adds a swap at the end of the day, usually while you are packing up, moving between locations or losing light. The value of a schedule is that it moves those actions to moments where they cost nothing.

A rotation table you can copy

Stage Battery in use Reason
Departure to the first break 750mAh (A) Best energy and densest shooting, which a small battery can still cover
Mid-session main shooting 750mAh (B) Keeps the rhythm; swap when spent without breaking the thread
Wrap-up and the journey back Original LP-E17 Largest reserve for an unexpected last sequence

This order is not a rule. If your day is front-light and back-heavy, with a slow morning and a concentrated afternoon, put the original in the afternoon and let the two 750mAh batteries cover the morning. The question is always which block of the day cannot be interrupted, and the best battery goes there.

It also pays to number or label the three batteries. The usual failure in a mixed set is not charge but memory: you cannot tell which one is full. A marker pen on the back, or three colors of tape, costs nothing and removes the guesswork.

Four things to watch when mixing

  1. Charge one at a time, never in a mixed batch. The LC-E17 is a single-bay dock charger, one battery at a time, which removes the problem by design. If you use a third-party multi-bay charger, make sure each bay is managed independently and do not treat batteries of different capacity and different remaining charge as one group.
  2. Do not top up for ten minutes and drop the battery back in the bag. The common bad habit is a short charge after a shoot, then assuming the battery is full next time. Either charge it fully or label it clearly as half full.
  3. Avoid storing batteries fully charged or fully flat. Four to six tenths is better for long storage; the same principle applies to both capacities and is covered in the 950mAh storage notes.
  4. In cold weather, give short tasks to the small battery. Cold cuts usable capacity on every battery, and small batteries feel it more. Outdoors in winter, keep spares in an inside pocket and fit them only when you rotate.

One point that gets missed: do not drop a just-removed battery into a pocket with keys and coins. A short across the contacts is unlikely, but the consequences are not trivial. The original box or a battery case with dividers is the cheapest prevention.

When not to mix

If the camera is covering work that cannot be repeated, such as a wedding, an interview or the main angle on a commercial set, standardize on larger and more consistent batteries and remove variables. The cost of mixing is not risk but uncertainty: you have to remember which battery is which and how long each has been in service, and that is extra cognitive load under pressure.

For travel, street work and family records, where an interruption is survivable, mixing has almost no downside and lowers the cost. That is exactly where the 750mAh battery earns its place: it is cheap enough to buy a couple of spares so you never have to choose between saving power and shooting more. To move the configuration up a tier, see the combinations in the capacity and compatibility guide.

FAQ

Does mixing original and third-party batteries damage the camera body?

No. The body only cares that the voltage is within range and that communication works. The practical effect of mixing is that each battery lasts a different length of time, which has nothing to do with safety. The premise is a battery from a legitimate source with a working protection board.

Should three batteries be rotated?

Yes. Using one battery constantly while two sit idle ages the idle pair faster, while using a single battery forever pushes its cycle count far above the others. Keeping the three cycle counts roughly even gives a longer working life overall.

How can I tell quickly whether a battery is full?

Fit it in the body and read the gauge, which is the most direct method; the bodies that take the LP-E17 generally show segmented bars. With no body to hand, charge it fully on the dock before storing it and mark the battery, which is more reliable than memory.

Are two 750mAh batteries plus one original enough for a day out?

In most cases yes. The combined capacity works out at about two and a half times an original battery, which usually covers a day of stills and moderate bursts. For all-day 4K recording or heavy bursts, add a battery or make the 950mAh your primary.

Posted on — Leave a comment

Canon LP-E6NH vs Nikon EN-EL15 vs Sony NP-FZ100

The short answer: Canon’s LP-E6NH, Nikon’s EN-EL15 series, and Sony’s NP-FZ100 belong to the same class — roughly 15–17Wh of energy and 2100–2600mAh of capacity — and the differences between them are much smaller than the differences between the cameras they power. None of the three interchange. Shape, contacts, and communication protocols all differ; each pack serves only its own brand’s bodies. What decides how long you can shoot is your camera’s power draw and how you use it, not the handful of milliamp-hours between these three cells. Below is the spec table, what each line actually means, and practical advice if you run more than one system. Sony’s internal split between battery families is covered separately in every Sony mirrorless battery model explained.

YO NP-FZ100 camera battery render
Product render of the YO NP-FZ100 compatible battery: front label, rear LED charge indicator and USB-C port.

Spec comparison

Item Canon LP-E6NH Nikon EN-EL15 series Sony NP-FZ100
Rated capacity Around 2130mAh class Around 2100–2600mAh (varies by version) 2280mAh (original) / 2600mAh (our compatible version)
Nominal voltage Around 7.4V Around 7.0V 7.2V
Energy (Wh) Around 15Wh class Around 15–16Wh class About 16.4Wh (original) / 18.72–19.24Wh (our compatible version)
Chemistry Lithium-ion Lithium-ion Lithium-ion
Typical bodies EOS R5, R6 series, 5D series, others Z-series mirrorless, D850, D500, others A7 III/IV, A7R III/IV/V, A7S III, A9 series, A1, A6600, A6700, A7C series, FX3, FX30, ZV-E1
In-camera fuel gauge Supported Supported Supported
Interchangeability None across the three; no adapter exists
Air travel All far below 100Wh; spares go in carry-on, never checked

Note: the table summarizes published specifications at the order-of-magnitude level; variants and revisions shift individual figures slightly, so treat each maker’s official rating as authoritative. We make no pricing or purchasing recommendation for Canon or Nikon original batteries.

Reading the numbers

Wh is the only fair comparison

You can’t compare mAh across different voltages; energy can. Wh = capacity (Ah) × voltage (V). Run all three through that and they cluster within about ten percent of each other in the 15–17Wh band. Same shooting load, similar theoretical ceiling.

Runtime differences live in the camera

Runtime equals capacity divided by draw. A high-resolution stacked-sensor body, an 8K video body, or something with aggressive stabilization and live view can draw several times more than a simpler camera. Most “brand X lasts longer” conclusions are really comparisons between cameras.

What the voltage gap means

The EN-EL15 line sits at about 7.0V while the LP-E6NH and FZ100 run about 7.2V — the same design class either way. It reflects each company’s internal power design, not superiority in one direction or another.

Communication and the fuel gauge

All three report percentage remaining inside their own bodies. With third-party packs, some Sony cameras show a notice that remaining charge may display inaccurately; you can keep shooting, it’s expected behavior. A harsher “cannot be used” message warrants investigation — start with the contacts and the compatibility list.

Three hard reasons they don’t interchange

  • Mechanical fit. Different length, width, depth, and latch design; each physically refuses the other’s bay.
  • Contacts and protocol. Even where shapes look similar, pin definitions and handshakes differ, so the body can’t identify the pack.
  • Voltage and discharge behavior. Forcing it risks short circuits, over-discharge, and damage. Not worth attempting.

Battery planning if you shoot multiple systems

Scenario Suggested kit Notes
Sony body, everyday shooting Two NP-FZ100 packs Covers a normal day comfortably
Sony body, weddings or commercial work Three or four NP-FZ100 packs Heavy bursts and video
Locked-off long recording Two packs plus a dummy battery Cuts downtime for swaps
Running Sony alongside Canon or Nikon Separate pools per system Never mix them in one pouch; label by system
Cold environments 1.5–2 times your usual count At -10°C you may keep only about half

Three things that actually matter when buying

  • The model matches your body. Confirm the battery type first, then compare capacity and price.
  • The specs are stated plainly. Capacity, voltage, and energy should all be printed. Vague labeling deserves suspicion.
  • Warranty and batch are documented. Clear return terms and a visible production or batch code; both should be visible on the pack or its packaging.

On price, Sony’s original NP-FZ100 generally starts at $70 and up through official channels. Compatible cells are a legitimate alternative: YO’s NP-FZ100 is around $17.89, about $22.93 with one battery and a charger, and about $36.74 for two batteries and a charger.

FAQ

Similar energy means any system is the same choice, right?

Batteries, close enough. Cameras, not remotely — power draw varies widely. Pick a system for its bodies and lenses; the battery only determines how many you carry.

Can an adapter or mod make them cross-compatible?

We don’t recommend trying. Voltage, discharge characteristics, and protocols all differ, and improvising risks short circuits and damaged gear.

Why doesn’t Sony push FZ100 capacity higher?

Physical size and weight set the limits, as do shipping and aviation safety rules. The current approach is raising energy density within the same footprint — hence USB-C versions.

Does care differ between the three?

Not meaningfully. Top up often, avoid sitting at 100%, store at 40%–60% in a cool dry place, recharge every three months, and retire anything that swells.

Bottom line and buying notes

Two charging options, same capacity: standard 2600mAh (dock required) or USB-C 2600mAh (phone charger or power bank). Pick the version on the NP-FZ100 product page; bulk pricing via wholesale.

Posted on — Leave a comment

Storing an LP-E6NH for Three Months — Swelling Risk

Short answer: three months unused is not a problem as long as you store the pack at 40–60% charge, in a cool, dry place, with the contacts protected from shorting. A healthy LP-E6NH will not swell simply because it sat in a drawer for three months. Swelling comes from long periods at full charge combined with heat, from overcharging or over-discharging, or from physical damage — it is an issue of how the pack is used and stored, not of elapsed time.

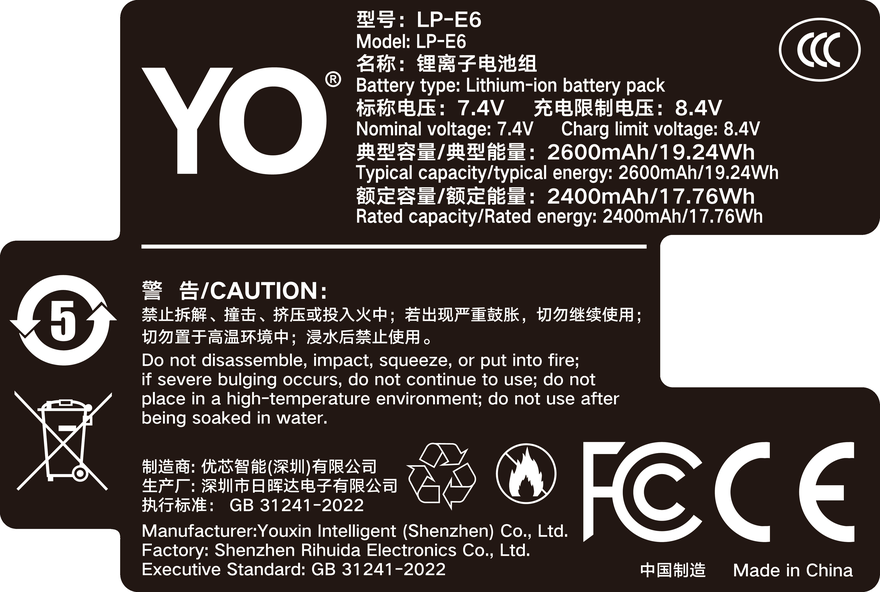
YO LP-E6NH battery rating label
Rating label of the YO LP-E6NH battery: nominal voltage, typical capacity and safety certifications.

Many people put a battery away fully charged, thinking it will be ready to use next time. That is exactly the wrong state for storage. At a high state of charge the cathode sits at a higher potential and electrolyte side reactions are more active; add the heat of a summer drawer and aging runs noticeably faster than at half charge. Three months is unlikely to cause a failure, but repeating it for three or four months every year adds up.

1. Three parameters — charge, temperature, humidity

Charge level matters most. Too high accelerates side reactions; too low risks self-discharge pushing the pack into over-discharge, which can cause irreversible capacity loss or leave it unable to charge. 40–60% covers both ends, and most manufacturers’ long-term storage guidance lands in that range. Lithium-ion self-discharge is typically in the single digits per month, so three months costs little and there is no need to worry about it running flat.

Temperature is the most underestimated factor. Aging rate is quite sensitive to heat; stored above 30°C, capacity loss runs clearly faster than at around 20°C. So keep packs out of balcony cabinets, cars, and spots near radiators or routers that stay warm.

Humidity mainly affects the contacts and the protection board. In damp conditions metal contacts oxidize, which shows up as poor contact and camera errors. A desiccant packet or a dry box is a cheap and effective measure, but you do not need lens-grade rigor.

2. Four steps before storage

  1. Confirm the charge level. Put the pack in the body and check the percentage. Above 70%, shoot down to about 50% before taking it out; below 30%, charge it to 50% first. Do not top it off “so it keeps longer.”
  2. Clean the contacts. Wipe the metal contacts with a dry, lint-free cloth to remove fingerprints and dust. Do not flood them with alcohol, and do not scrape them.
  3. Store packs separately. Put each pack in a terminal cover or its own small pouch so it cannot sit against other packs, keys or coins and short its contacts. This matters more than many people expect — a short can generate a great deal of heat in seconds.
  4. Pick the spot. A cool, dry, dark drawer or cabinet with a stable temperature, away from heat sources and water. One desiccant packet is enough.

Three months needs no top-up in between. If you are storing for more than six months, check the charge every four to six months and bring anything below 30% back to about 50%. The purpose is to prevent over-discharge, not to “reactivate” the pack.

3. What causes swelling, and three checks you can do

Cause Mechanism Typical scenario
Long storage at full charge plus heat Electrolyte decomposes and generates gas at high potential, raising internal pressure A full pack in a sun-baked car or a summer drawer
Overcharging A faulty or non-compliant charger pushes voltage past the limit No-name chargers, packs with no protection board
Over-discharging Forcing a charge into a deeply discharged pack damages the internal structure and generates gas Fast-charging a pack that sat flat for months
Physical damage A drop or a crush damages the internal separator A pack falling out of a bag onto hard ground

Note that “sitting unused” is not on that list. The combination worth watching is full charge plus heat, which is also the most common everyday situation.

The flat-surface test. Put the pack on a level surface (glass or marble is best), press one corner lightly and release. Does it rock like a spinning top? A slight rock can be case tolerance; a clear wobble is a warning.

Sight along the side in the light. Stand the pack on its side and check whether the case seam has opened or the sides bulge in a symmetrical arc. A healthy LP-E6NH should have flat, straight sides.

How it feels going in. If it goes into the body or the charger noticeably tighter, needs force, or the latch will not seat, the shape has already changed — do not force it and risk jamming it in the compartment. Of the three checks this is the most direct and reliable: if one is questionable and the other two are fine, keep watching; if two or more are off, retire the pack.

4. The first use after storage

After three months, check the charge level before deciding whether to charge rather than dropping it straight onto the dock. If it reads zero or the body does not recognize it at all, do not force a charge — that may be over-discharge, and pushing current into it carries risk. Treat it as end-of-life instead. If the level is in the normal range, one or two ordinary charge-discharge cycles bring it back; no special “activation” routine is needed.

Also, before the first demanding shoot after long storage, run one light-load full cycle and watch for unusual heat or sudden jumps on the gauge. It amounts to a cheap check-up.

For compatibility and recognition differences across generations, see the LP-E6NH category and the LP-E6 category. If you also shoot in the cold, the general conclusions in battery behavior at low temperatures apply to how temperature affects usable capacity. The same storage rules apply to YO’s LP-E6NH-compatible packs — leave them at about half charge before putting them away. One naming note: LP-E6+ is not a Canon designation, it is how some third parties label an enhanced pack, so follow the cell chemistry rather than the label.

FAQ

Is it okay to leave a battery in the camera for three months?

Not recommended. A body on standby draws a small current continuously, which over months can pull the pack into over-discharge, and the space inside a body is tight and vents poorly. Taking it out and storing it separately is safer.

It has swollen slightly — can I still use it?

No. Swelling means gas has formed inside and structural integrity is reduced. Continuing to charge and discharge it is a safety risk, and it may jam in the body. Dispose of it under local e-waste rules rather than in household trash.

Is the refrigerator a better place to store it?

Not recommended. A household fridge is humid, and condensation forms when you take the pack out, which is hard on the contacts and the protection board. Very low temperatures also affect the electrolyte. A cool, dry room is enough; there is no need to chill it deliberately.

Capacity dropped after long storage — is the pack failing?

Not necessarily. Some capacity loss is recoverable and comes back after a few normal cycles. Only if it stays clearly below the pre-storage level after several full cycles has irreversible degradation set in. That judgment needs a baseline, so record runtime before you put a pack away.

Posted on — Leave a comment

A7S III Two-Camera Shoot: A Four-Battery Rota with DR-FZ100

Short answer: the right way to run four packs across two cameras is not to give each body two — it is to number all four, pair them permanently by camera position, and stagger the swaps so that at any moment only one pack is recharging in the case and another is ready to go. That way you never reach a point where both bodies are flat with nothing charged. What follows is a rota you can copy directly.

The scenario: two A7S III bodies, one as the main angle (wide, head-on) and one as the second angle (side or hands), four NP-FZ100-class packs — two OEM and two third-party units such as the NP-FZ100 (USB-C). Audio is recorded separately, with each take running 40–50 minutes and a 15-minute break between takes.

Step one: number and pair

Label the packs A1, A2, B1 and B2, with the sticker on the back away from the contacts and the heat path. Group A belongs to the main camera, group B to the second camera; they do not cross over or mix.

The reason for fixed pairing is that two packs used in the same body gradually converge in how they discharge, so your sense of how long a given pack will last gets sharper over time. Random allocation each day means relearning that every time. Constant mixing also levels out the wear across all four, which removes the buffer of always having one pack in better condition.

If the four are a mix of OEM and third-party, pair by capacity and condition rather than by brand. Two packs in similar shape in the same group make the swap rhythm predictable.

Step two: work out usable time per pack

Recording format Whole-camera draw Runtime per pack At 40 minutes a take
4K 24p 10-bit 8–9W About 100–120 minutes 2 takes, margin is tight
4K 60p 10-bit 9–10W About 85–100 minutes 2 takes, comfortable
4K 120p 10-bit 11–12W About 70–85 minutes 1 take, swap before the second

The figures are ranges derived from a power model, not measurements from a particular body. Temperature, screen brightness and whether stabilization is on all shift them, and a twenty percent deviation is common. Plan around the lower end of each range rather than the upper — the margin you leave is your room for error.

At 4K 60p and the 85-minute lower bound, one pack covers two 40-minute takes with something to spare. That means a morning of four takes needs only one swap per camera. That is the most comfortable rhythm available: fewer swaps, fewer interruptions.

Step three: stagger the swaps

This is the most important rule in the whole plan. If both cameras swap at the same moment, you get a window where both are stopped — precisely the situation you least want, especially when the two angles have to be matched, since realigning timecode after an interruption is a chore.

The method: swap camera A after take two, and camera B after take three. That way, whenever one body is swapping, the other is still recording, and only one camera goes down at a time. The pack that comes out goes straight into a DR-FZ100 slot to recharge, with the second slot reserved for the pack due to come out next.

A schedule you can copy

Time Camera A (main) Camera B (second) Case status
Take 1, 09:00 A1 recording B1 recording Empty
Break, 09:40 A1 continues B1 continues Empty
Take 2, 09:55 A1 recording (margin tight) B1 recording Empty
Break, 10:35 Swap to A2, A1 on charge B1 continues A1 charging
Take 3, 10:50 A2 recording B1 recording (margin tight) A1 charging
Break, 11:30 A2 continues Swap to B2, B1 on charge A1 full, B1 charging
Take 4, 11:45 A2 recording B2 recording B1 charging

What matters in this table is not the clock times but the constraint behind them: only one pack charges at any moment. That guarantees the case always has a free slot ready to receive a pack that has just come out, and that you always know exactly how long the other pack has been on charge and roughly where it stands.

Step four: the recharge rhythm

Breaks are usually only ten to fifteen minutes. Taking a pack from low to fifty or sixty percent in that window is realistic; reaching full is not. So do not expect a break to finish a pack — the right expectation is partial top-up between takes, full charge at lunch or after wrap.

The lunch hour is the most effective window. One pack will very likely reach close to full in that time; two depends on the case’s total output, and if the slots share power, charging both is considerably slower than charging one. That is a practical point: at lunch, charging a single pack is often a better use of the hour than loading both.

If your packs are NP-FZ100 (USB-C) units with a built-in USB-C port, there is a further option: a pack that comes out need not go into the case at all — plug it into a power bank and leave the case free for the other one. You have effectively gained a third charging position. On long location days this combination is very practical, and the FX3 power article covers the underlying approach.

Details that catch people out

  • Never swap mid-take. A pack reading 15% can hit the warning within minutes. Put swaps in the breaks and do not gamble.
  • Confirm the pack is seated before you walk away. A pack that is not latched may still light the indicator while not actually charging, and you only find out when you fit it and it is empty.
  • Let a hot pack cool first. After continuous recording the pack surface is warm, and going straight into a closed case stacks the heat. Give it five minutes, or charge with the lid open.
  • Log how each pack performs. Note on your phone that A1 lasted to the end of take two with one bar left; after a few takes your estimates correct themselves.

The value of a rota is that it absorbs uncertainty in advance. At the scale of four packs, two bodies and four takes, getting numbering and staggering right means almost no on-the-spot decisions. More detail is in the DR-FZ100 category, and judging pack condition is covered in the direct-charge battery category.

FAQ

Are four packs enough for a full day of two-camera work?

At four takes a day of forty minutes each in 4K 60p, usually yes, but without much spare. With more takes, longer ones, or 4K 120p, go to six packs or add external power to the fixed camera. The test is whether you can hold the state of two packs in use, one charging and one full at the start of every take — if you can, you have enough; if not, add packs.

Can the two cameras share packs?

Physically yes, but it is better not to swap them mid-shoot: it breaks your runtime expectations and levels out the wear curves. Swap only in an emergency, then update the numbering notes afterwards.

Can the case sit next to the cameras?

Yes, with two cautions: do not put it on the floor where it can be kicked, and do not press it against equipment that runs hot. A partly open lid helps heat escape but lets dust in, so on a dusty set keep it closed and top up back at the hotel.

Why stagger the swaps rather than doing both at once?

Swapping both saves you a few movements and costs you the risk of both cameras being down together. On a two-camera shoot the angles usually complement each other, so a simultaneous interruption means that stretch exists on neither card. Staggering costs two extra minutes and guarantees at least one camera is always recording, which is the better trade.