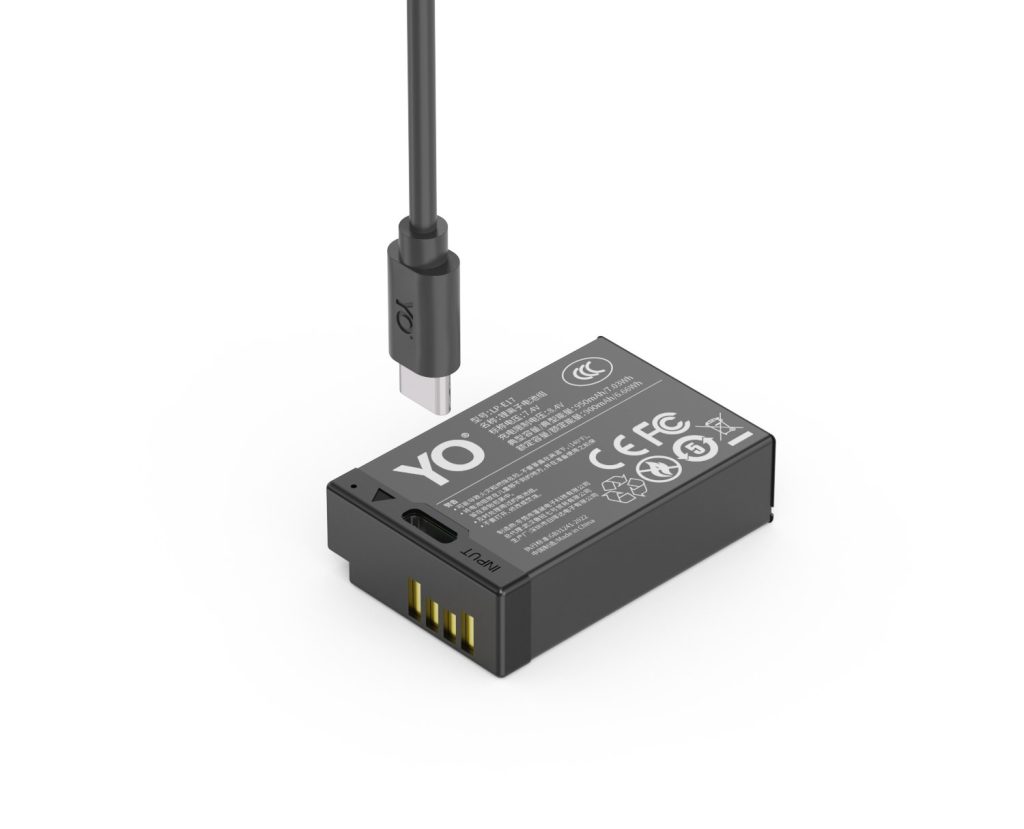
Posted on — Leave a comment

Inside a Third-Party NP-FZ100: Cells, Protection Board and Control Chip

Open up a third-party NP-FZ100 and there are only four things worth looking at: the cells, the protection board, the communication circuit and the shell. Across the price band that matches our NP-FZ100 at around $17.89 per cell, our lab testing generally finds structure and protection circuitry to be reasonably complete. Where samples separate is cell consistency and solder quality. On usable capacity against the label, the range we typically observe runs from about 90% of the rated figure up to close to the full number, with the occasional sample below that.
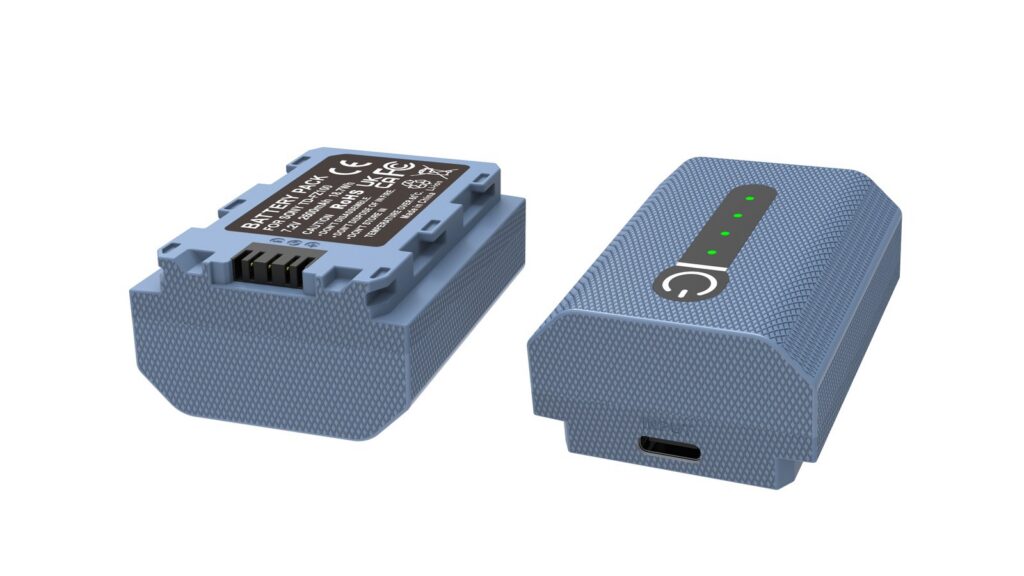
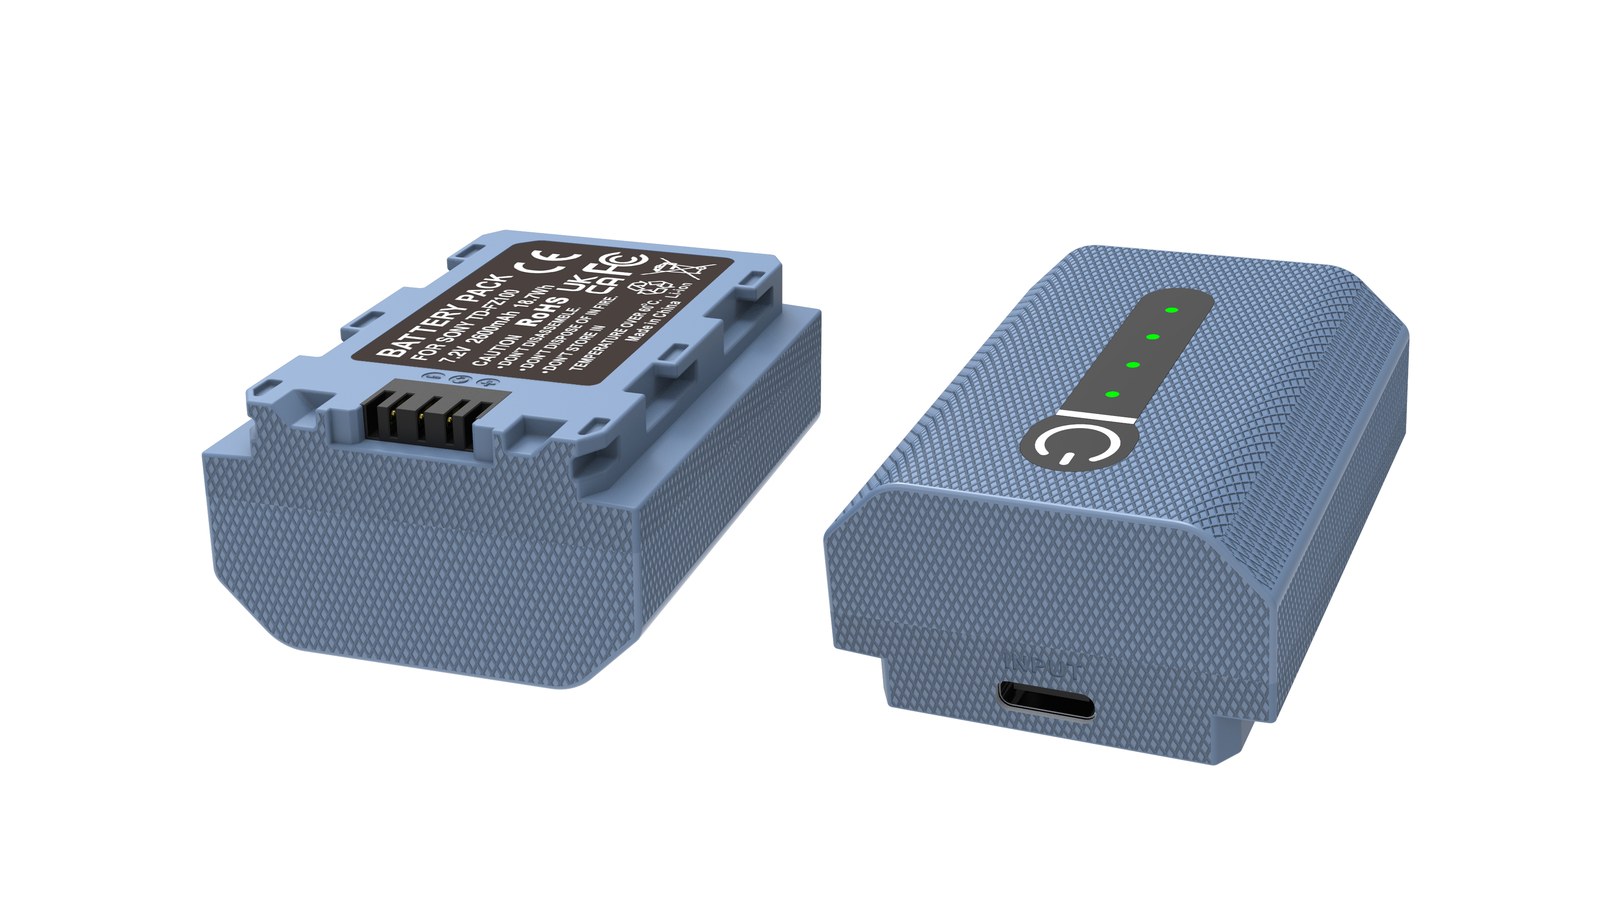
YO NP-FZ100 camera battery render
Product render of the YO NP-FZ100 compatible battery: front label, rear LED charge indicator and USB-C port.

One caveat up front: what follows is structure and build quality, not precise per-unit numbers, and no single visual detail should be used to judge whether a cell is good.

Before opening anything: safety and method

  • Don’t do this at home: a lithium pouch or can that is deformed or shorted can heat up and ignite. Read the structure below as public reference and service-level information.
  • Discharge first if you must open one: a full cell carries far more energy into a short.
  • Never puncture, bend or burn a cell: a swollen one stops being used and goes to a recycling point.
  • Opening voids the warranty: everything below comes from samples prepared specifically for this purpose.

Swelling and other safety questions are covered in are third-party camera batteries safe and in our guide to handling a swollen NP-FZ100.

Part one: the cells

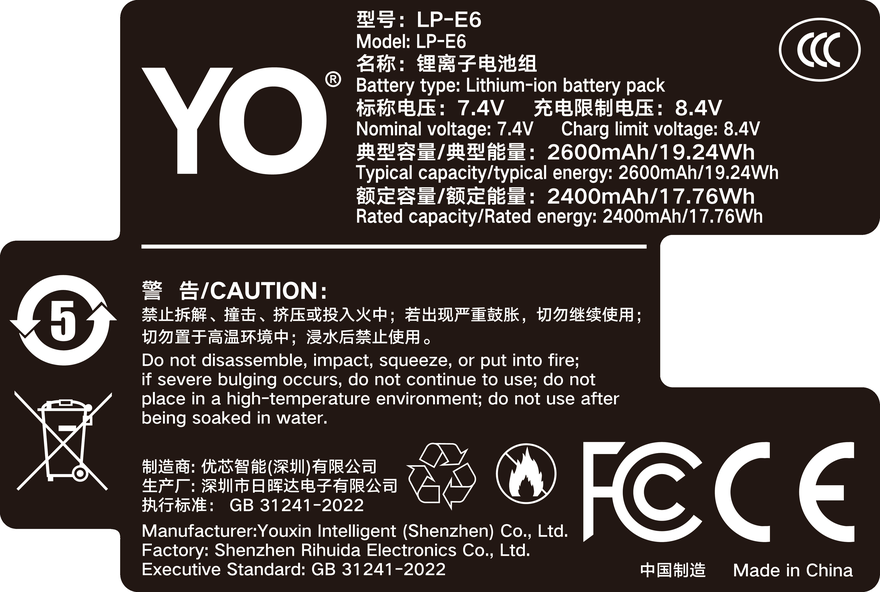
The NP-FZ100 is rated 2600mAh / 7.2V / around 19.24Wh. That nominal 7.2V points to the usual two-cells-in-series (2S) layout: two 3.6V nominal cells stacked. In practice you see two formats:

Format Characteristics What to look at
Two cylindrical cells, aluminum or steel can Easier to match, lends itself to standardized packs A dedicated holder, and solder joints that look full
Pouch (polymer) cell Adapts to the shape, uses shell space well Cushioning around it, and no creases at the edges

A few indirect indicators we lean on in our own testing:

  • Usable capacity against the label: under fixed conditions we generally see somewhere in the 90%–100% band.
  • Spread between samples of the same model: the tighter the numbers across several samples run under identical conditions, the better the consistency control.
  • Voltage settling after a full charge: a small drop over time is normal; a fast slide usually means higher self-discharge.
  • Capacity retention after cycling: hard to measure short-term. Judge it by feel after a few months of real use.

To check whether the cell in your hand is honestly rated, see how to spot inflated capacity ratings.

Part two: the protection board (PCM)

The protection board is the small circuit inside the pack that keeps abnormal conditions contained. The parts worth recognizing:

  • Protection IC and MOSFETs: handle overcharge, over-discharge, overcurrent and short circuit.
  • Fuse or resettable protection device: the last physical line of defense under fault current.
  • NTC thermistor: feeds temperature back to the charger or body, which is what cold and overheat protection hang on.
  • Balancing resistors: passive balancing between the two series cells, slowing the drift in voltage between them.

In our experience, mid-priced samples usually include all of the above. Differences show up in component selection, solder quality and whether any insulating separation is present. Packs with no separator, holding cells in place with tape alone, tend to survive drops less well. Worth saying plainly: a protection board reduces risk, it does not remove it, so any claim of zero risk is not credible.

Part three: the communication circuit, or “chip”

To show a percentage on screen, the body has to talk to the cell. On the battery side there is usually a small MCU or a dedicated fuel gauge returning voltage, current and temperature in the format the body expects.

  • With a communication circuit: the body shows a percentage, and the reading is generally usable.
  • Some Sony bodies warn that remaining charge may not display accurately: a routine message with compatible cells. Power is unaffected and shooting continues.
  • “Cannot recognize this battery”: that is a fault. Clean the contacts, try another charger, then go to the seller.
  • Jumpy gauge readings: usually a fuel-gauge calibration issue, often settled by one full charge-and-discharge cycle.

The mechanics of gauge reporting are explained in our chipped versus non-chipped comparison, and error handling is in our unrecognized battery fix.

Part four: shell and structure

  • Material: flame-retardant PC/ABS is typical; the surface should be free of burrs and sink marks.
  • Internal fixing: cells should sit in a holder or on cushions, with no rattle when you shake the pack.
  • Contacts: even plating, no obvious wear after a few dozen insertions.
  • Catch and dimensions: it should go in smoothly without play. Too tight wears the compartment, too loose risks intermittent contact.
  • Seam finish: ultrasonically welded seams are usually tidier, and also the part you should never pry at.

Appearance and actual consistency do not line up one to one. Cleaner build suggests controlled process, but cell quality still needs measured data to confirm.

Turning structure into a buying checklist

  • Clear model, capacity, voltage, Wh and responsible party: the baseline for traceability.
  • Specific protection functions named: overcharge, over-discharge, overcurrent, short circuit — written out, not implied.
  • Warranty term and how to reach someone: worth more than any build description; see the NP-FZ100 warranty page.
  • Buy several from one batch: easier to manage and easier to compare.
  • Both versions hold 2600mAh. The only difference is charging: the standard pack needs a dock, while the USB-C version runs off any phone charger or power bank.

FAQ

Does opening a cell ruin it?

Yes. Once the shell is pried apart, sealing and cell fixing are compromised. Even glued back together, it should not go back into a camera, and it should not fly.

Can I judge quality from the cell brand printed inside?

Only as a hint. One maker’s cells come in different grades and batches, and end performance depends on pack consistency and protection design.

Why do some third-party cells fade noticeably after a while?

Usually limited cycle life in the cells themselves, compounded by deep discharges and hot charging. Holding around 80% capacity after 300–500 cycles is a normal range.

Do our teardown observations apply to every third-party cell?

They do not. Cell sourcing and process vary a lot between suppliers. What is here is a general structural read; any specific model still has to be judged on its labeling and warranty.

Two charging options, same capacity: standard 2600mAh (dock required) or USB-C 2600mAh (phone charger or power bank). Pick the version on the NP-FZ100 product page; bulk pricing via wholesale.
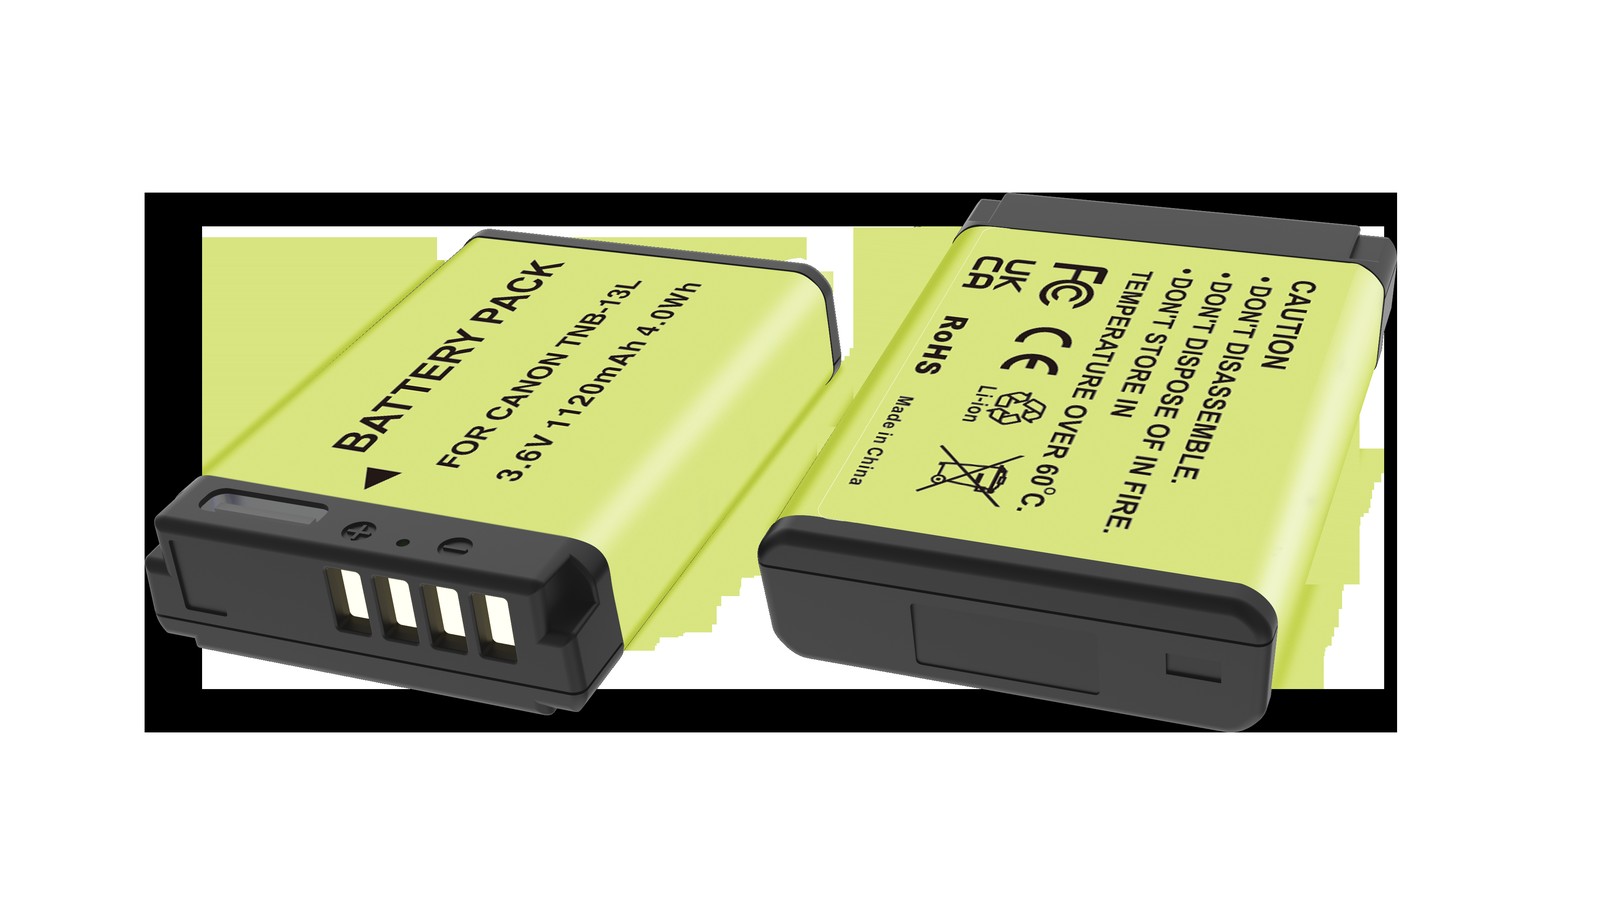
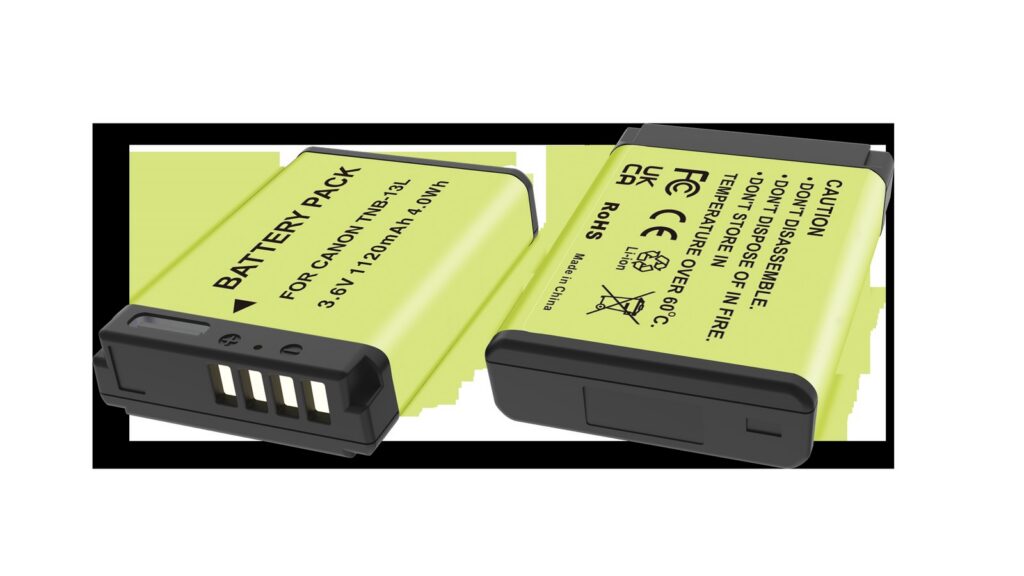
Posted on — Leave a comment

NB-13L Compatibility Chart: 12 Bodies and the Models That Do Not Fit

The NB-13L covers 12 bodies, from the PowerShot G7 X to the PowerShot S120; the most common buying mistake is not capacity but boundary cases such as LP-E17 / NB-11L. The table below lists every compatible body by series, followed by the models that take a different cell. Always trust the marking on the camera or in the battery compartment: similar-looking packs are not necessarily interchangeable, and NB-13L / NB-13L II should still be checked against the contacts and firmware of your body.

By CIPA standard the G7 X Mark III delivers about 235 shots per charge (200 / 4K 60 min). Real-world figures fall with viewfinder use, bursts, flash and low temperature, so budgeting around 70% of the rating is safer.

Full compatibility list

All 12 bodies below accept the NB-13L or a cell from the same family, grouped by series. “Compatible” means the compartment and contacts match; it does not guarantee that older bodies can exploit the full capacity of a high-capacity pack.

Body Body Body Body
PowerShot G7 X PowerShot G7 X Mark II PowerShot G7 X Mark III PowerShot G9 X
PowerShot G9 X Mark II PowerShot G5 X PowerShot G5 X Mark II PowerShot SX620 HS
PowerShot SX720 HS PowerShot SX730 HS PowerShot SX740 HS PowerShot S120

Which models do not fit

This is where search results most often mislead. Packs with similar names and near-identical shells frequently belong to entirely different systems, and forcing one in can damage the compartment.

Item Value
NB-13L NB-13L / NB-13L II
NB-13L 1250 mAh / 4.5 Wh
nb13l-2 1120 mAh / 4.15 Wh
G7 X Mark III 235 / 200 / 4K 60 min
LP-E17 / NB-11L NB-13L / NB-13L II
NB-13L / NB-13L II 1120 mAh / 4.15 Wh

How to check before ordering

The reliable check is the model printed on the bottom of the body or inside the battery compartment, matched against this list. On a used camera, also confirm that a previous owner has not swapped the battery door.

To pick by model, start with the specifications and stock status on Canon NB-13L 1120mAh, then browse the full article set in NB-13L; if your body belongs to a neighbouring system, LP-E6 has the side-by-side explanation.

FAQ

How many bodies take the NB-13L?

Our list contains 12 bodies, from the PowerShot G7 X to the PowerShot S120. It is grouped by series, but still check the body marking, since a later generation in the same line can switch cells.

Is the NB-13L interchangeable with neighbouring models?

NB-13L / NB-13L II shares one shell and contact layout, so those cells fit each other. However, LP-E17 / NB-11L, and those bodies need their own cell — never judge by shape alone.

Will every body on the list benefit from higher capacity?

All of them run normally, but older bodies set their cutoff and fuel gauge to the original specification, so extra shots do not scale linearly and the percentage may read conservatively.

How do I confirm which cell to buy?

Read the model on the bottom plate or inside the battery compartment and match it against this list. If the marking includes a suffix or a “for use with” note, follow the manual rather than the capacity figure.

Posted on — Leave a comment

Choosing a Third-Party NB-13L: Decoder, Capacity, Charger

Short answer: choosing a third-party NB-13L comes down to three things — whether the decoder is complete, whether capacity is stated in Wh and stays within the physical ceiling, and whether the charger controls its bays independently. The decoder decides whether the body shows charge correctly, Wh decides whether the numbers mislead you, and the charger decides how long the pack lasts. Pass all three and a compatible pack is perfectly usable as a primary.

YO NB-13L camera battery render
Product render of the YO NB-13L compatible battery: front label, rear LED charge indicator and USB-C port.

The genuine NB-13L is rated 3.6V, 1250mAh and 4.5Wh. Energy density at this size has a hard ceiling, so anything of the same dimensions claiming 1800mAh, let alone 2000mAh, has either changed cell chemistry — all but impossible in consumer products — or simply written a bigger number. Understanding that filters out most of the marketing.

The first gate: complete decoding

Canon bodies read pack information through the communication contacts to calculate remaining charge and health. Third-party packs fall into three tiers here:

  • Full decoding: the body shows a percentage and remaining shots normally, and the original charger recognises and charges the pack. This is the pass mark.
  • Partial decoding: the body powers on and shoots, but the gauge is inaccurate — slow at first, then falling to zero abruptly. The original charger may refuse it, leaving you with a third-party charger.
  • No decoding: the body reports an unrecognised battery and treats it as unknown. It usually still supplies power, but with no charge information at all.

Partial decoding is the awkward tier because it looks workable. Halfway through a shoot the body says two bars remain when there are only minutes left, and that misjudgement wastes more time than a plain error would. The test is simple: charge fully, then record continuously and watch whether the gauge falls evenly from 100% to shutdown. Uneven steps mean the estimate is being padded.

One further detail: some bodies change how they handle third-party packs after a firmware update. If a pack worked when you bought it and errors after an update, read the release notes before concluding the pack has failed.

The second gate: overstated capacity

Measure Genuine Acceptable third party Cause for caution
Rated capacity 1250mAh 1150-1300mAh 1500mAh or more
Energy 4.5Wh 4.1-4.7Wh mAh only, no Wh stated
Charge time About 2 hours 10 minutes 2-2.5 hours “Full” within an hour
Weight About 30g 28-33g Noticeably lighter
One week at rest, full Very little loss Under 5% More than 20%

Why look at Wh before mAh? Because mAh is only comparable at the same voltage, whereas Wh reflects energy directly. A 3.6V pack rated 1250mAh is 4.5Wh, and that relationship is fixed. A maker who lists mAh but not Wh usually does not want you doing the arithmetic.

Weight is an underrated indicator. Cell energy density sets a lower bound on weight for a given volume, so a pack claiming far more capacity while weighing less is almost certainly overrated. Without a precision scale, comparing it by hand against an original is enough to feel the difference.

Charge time is the third check. A 1250mAh pack charged at 0.7A should take close to two hours. If a pack reports full in half an hour, either its capacity is far below the claim or the charger’s cut-off detection is faulty — neither is desirable.

The third gate: the charger

The genuine CB-2LHT outputs 4.2V / 0.7A in a single bay and fills a pack in about 2 hours 10 minutes. Its real value is not speed but cut-off accuracy: 4.2V is the charging ceiling for this cell, and going past it accelerates ageing.

The common failing in third-party chargers is paralleled bays. A unit advertised as three-bay may feed all three from one output, so whichever pack fills first keeps receiving a trickle and swells first over time. Check whether the manual mentions independent control or independent channels, and whether each bay has its own indicator. Put three packs in and the lights should change individually, not in unison.

A USB charger is the other option. It is small, runs straight off a power bank and suits travel. The drawback is an output usually around 0.5A, so a full charge takes two and a half hours or more, and protocol compatibility with power banks varies. Fine as a backup; judge it on real behaviour before making it primary.

If you also use other Canon bodies, keep chargers separate. The NB-13L is a 4.2V single cell, the LP-E17 is 8.4V with two cells, and the LP-E6 is also 8.4V but at a different current. Similar-looking connectors do not mean interchangeable, and the wrong pairing can damage the cell outright.

Cells and protection boards: invisible, but they decide lifespan

At the same 1250mAh, cell quality determines how much capacity remains after 300 cycles. A properly built pack uses cells from a reputable supplier and typically holds above 80% after 300 cycles; poor cells can fade visibly within 100, which shows up as a pack that gets less useful the more you use it.

The protection board handles overcharge, over-discharge, overcurrent and short circuit. It is invisible until the day it matters. How to judge: a good product has even seams, clear capacity and voltage printing, and gold- or nickel-plated contacts, while a poor one has burred mouldings, blurred printing and plain brass contacts that blacken after a few insertions.

On price, an acceptable third-party NB-13L usually costs about half the original, and anything cheaper invites the question of where the cost was cut. The unit price in this class is low to begin with, so gambling on a cell that may swell to save a small amount is a poor trade.

The buying logic for small packs of this kind is universal: Sony’s NP-FW50 system is judged on the same three dimensions — decoding, Wh and charger. Learn it once and it carries over to whatever body you buy next.

FAQ

Will the camera treat a third-party pack as counterfeit?

Not if it decodes fully. The body only reads information; it does not judge brands, and correct communication is all that is needed for the gauge to work. A “cannot recognise” message means the decoder is missing or has failed, regardless of brand.

Is an NB-13L rated 1800mAh worth buying?

Not advisable. Energy density at this size has a physical ceiling, and 1800mAh is close to 1.5 times the original, which is not achievable without a change in volume. Such products are either overrated or built on very short-lived cheap cells.

Can the original charger charge a third-party pack?

A fully decoding one, yes; a partially or non-decoding one may be refused. Refusal is not a fault but the charger’s protective response when it cannot read the pack. Use a third-party charger in that case, and confirm its cut-off voltage is 4.2V.

How long will a third-party pack last?

At two or three charge cycles a week, a properly built pack starts to fade noticeably after about two years, showing as shorter runtime and faster drain. Retire it immediately if it swells. Storing at around half charge and avoiding heat adds considerably to its life. More maintenance detail is in the NB-13L section.

Posted on — Leave a comment

BLK22 vs BLF19 vs BLG10 for Lumix L-Mount and M43

Short answer: these three are not a new-for-old replacement chain but three parallel tiers matched to body class. The DMW-BLK22 (about 2200mAh / 16Wh) serves the S5 series, GH6, GH5 II and G9 II; the DMW-BLF19 (about 1860mAh / 13.4Wh) is for the GH5, GH5S, original G9 and GH4 generation; and the DMW-BLG10 (about 1025mAh / 7.4Wh) is for small bodies such as the GX85 and GX9. Their latches and contact positions all differ, so none will physically fit another’s slot. The only reliable basis for choosing is the model marking in the camera’s battery compartment — not the mount, and not the release date.

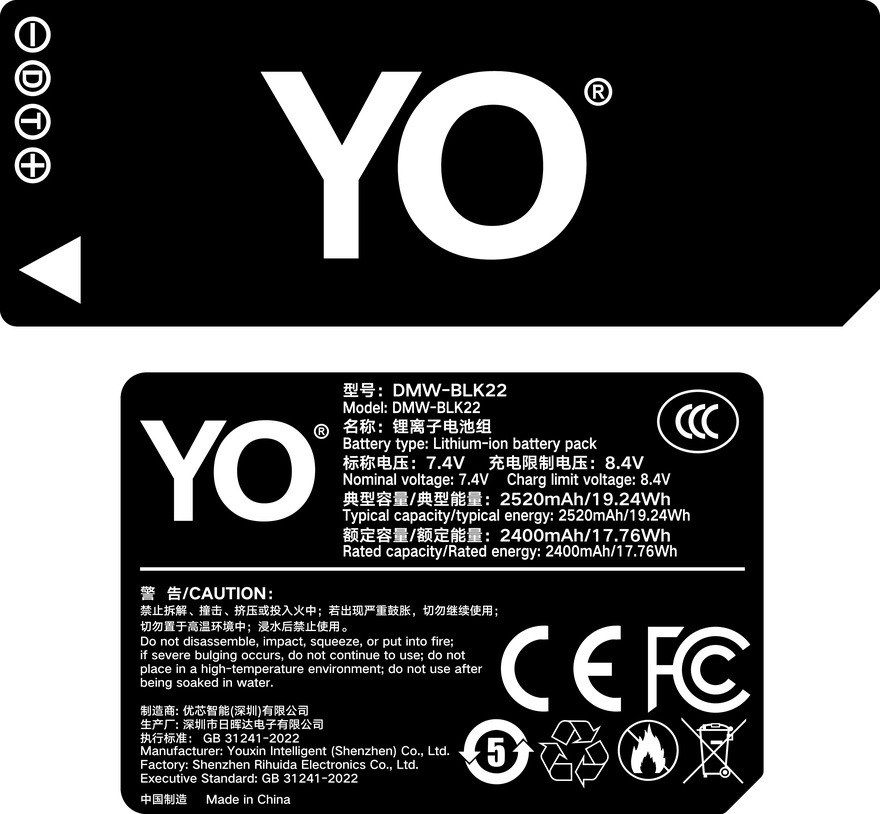
YO DMW-BLK22 battery rating label
Rating label of the YO DMW-BLK22 battery: nominal voltage, typical capacity and safety certifications.

Many people discover their spares are useless only after changing bodies, and the habit of buying by mount is usually the cause. The boundaries between the three are set out below.

1. How the three tiers differ

In the M43 era Panasonic split batteries by body size: small bodies took a thin pack to stay portable, flagships took a thicker one to support cooling and video performance. That logic carried into the L-mount era, with new model names.

Model Nominal capacity Energy Typical fitment
DMW-BLK22 About 2200mAh About 16Wh S5, S5 II, S5 II X, GH6, GH5 II, G9 II
DMW-BLF19 About 1860mAh About 13.4Wh GH3, GH4, GH5, GH5S, G9 (original)
DMW-BLG10 About 1025mAh About 7.4Wh GX85 / GX80, GX9, GF9 / GX850 and other small bodies

On paper the BLK22 holds about 20% more energy than the BLF19 and more than twice the BLG10. But a capacity gap is not a runtime gap: the bodies that take the BLG10 are mostly entry-level or portable designs with restrained features, so 7.4Wh is not especially tight there, while the BLK22 faces high-draw bodies like the S5 II and GH6 where 16Wh counts as merely adequate.

2. Why “L mount means BLK22” is wrong

This is the most common misconception. L-mount bodies do not share one battery: the S1, S1R and S1H use the DMW-BLJ31, which is noticeably larger in both size and capacity than the BLK22, while only the S5 series uses the BLK22. In other words, incompatible battery specs exist within a single mount.

The reverse also happens: compatibility can cross mounts, since the BLK22 serves both the L-mount S5 series and the M43 GH6, GH5 II and G9 II. That shows the split is driven by body platform and power design, not by lens mount. Remove “mount” from your criteria when buying and most mistakes disappear.

3. A four-step method for choosing

If you are unsure which pack your camera needs, work through these in order; it usually takes a minute or two.

  1. Open the compartment and read the marking: the back of the pack or the inside of the door usually carries a DMW- model number, which is the most authoritative source.
  2. Match the full body designation: note that the GH5 and GH5 II, and the G9 and G9 II, are separate generations with different batteries. A “II” suffix often signals a battery change.
  3. Compare contact count and latch shape: the BLK22 and BLF19 are similar in thickness, but the latch notch sits in a different place and the contact layout differs, which is visible to the eye.
  4. Then confirm charging: newer bodies mostly support USB-C PD in-body charging while older ones rely on a dock, which affects how many packs and chargers you buy.

If you run both L-mount and M43 systems, favour a combination that shares batteries — an S5 II with a G9 II, for instance — so spares and chargers overlap and you carry one battery type instead of two. The real burden is much smaller than the spec sheets suggest.

4. Mixing, adapters and third-party packs

Adapters advertised as “BLF19 to BLK22” turn up occasionally, but most only change the shape and cannot bridge the protocol differences. When the body cannot read battery temperature and cycle data, the mild outcome is a wrong charge reading and the severe one is a refusal to power on or a sudden shutdown mid-recording — a serious risk to footage being written. They are not advisable for paid work.

Third-party selection is more straightforward: keep capacity claims reasonable, require a complete protection circuit and prefer products that name the supported bodies. Brands such as YO list both BLK22 and BLF19 equivalents at modest prices, suitable as a supplement rather than a replacement. Two things are worth watching: buy the same batch, so that mixing old and new packs still gives a linear charge reading; and keep a return channel open, since some batches show compatibility prompts on high-draw bodies such as the GH6.

For a cross-brand reference on capacity and cold behaviour, the test methods in the NP-FZ100 section apply to any brand; if you shoot outdoors in the cold year-round, the operational detail in our minus 10°C battery test is worth reading first. Buying and care advice specific to the BLK22 is collected on the DMW-BLK22 category page.

FAQ

Will a BLF19 fit a GH5 II?

No. The GH5 II moved to the DMW-BLK22, and both compartment dimensions and contact positions differ, so a BLF19 will not seat properly. Only the original GH5 and GH5S take the BLF19, and since the two generations look alike, check the full model designation.

How big is the capacity gap between the BLG10 and BLK22?

By nominal energy, the BLK22’s 16Wh is more than twice the BLG10’s 7.4Wh. But they serve different body classes, so the multiple does not translate into shot counts — small bodies draw less, so each watt-hour goes further.

Are batteries always shared within a mount?

No. The L mount alone spans the BLJ31 and BLK22 among others, and S1-series packs will not fit an S5. Judge by body platform and battery model, not by lens mount.

Can the chargers for the three be mixed?

No. Panasonic docks are shaped around a specific pack and contact layout, so BLK22 and BLF19 chargers are not interchangeable, and forcing a pack in can cause poor contact. If you run several bodies, match chargers to battery models, or favour bodies with USB-C in-body charging to cut down on accessories.

Posted on — Leave a comment

LP-E17 on the R50, R10 and R8: Shots and Spare Packs

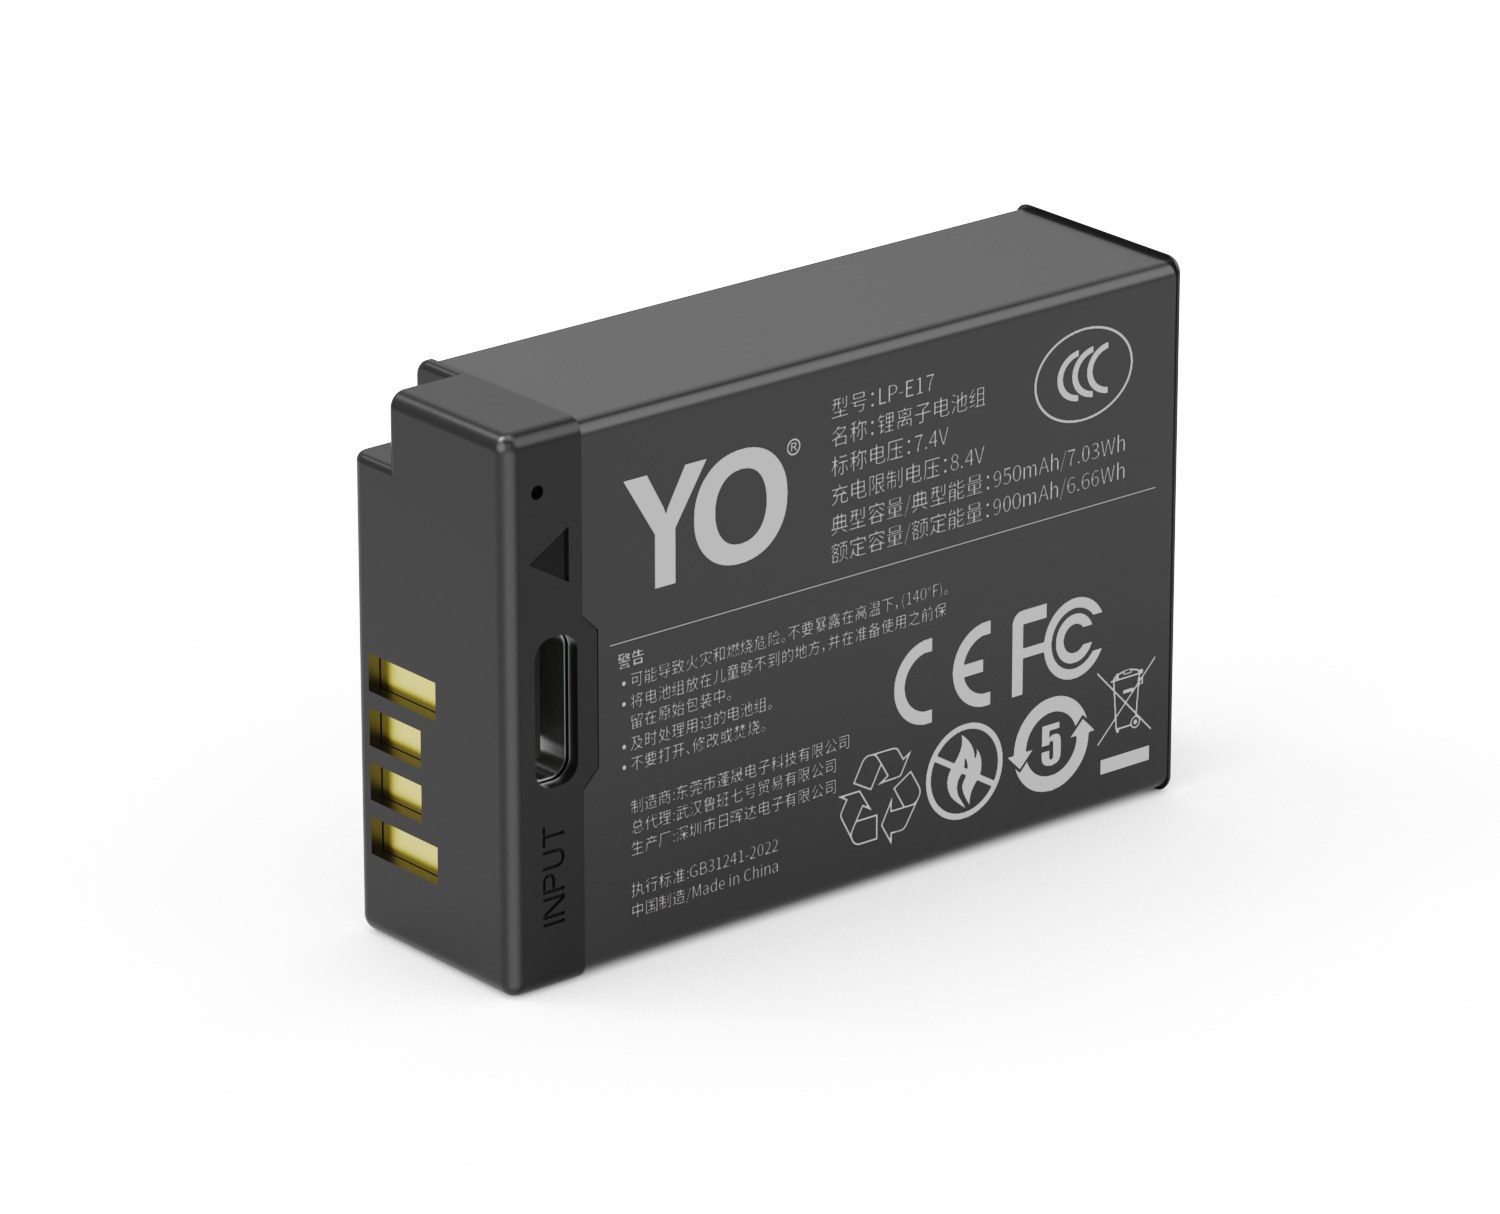
YO LP-E17 相机电池

Short answer: one LP-E17 gives an R50, R10 or R8 roughly 250-450 stills, or about 40-70 minutes of 4K. Two packs cover a half day out, three cover a full day of travel, and four is the figure for video-first work. The official CIPA numbers look higher because the test conditions are close to ideal: room temperature, a shot every so often, no Wi-Fi, no repeated review. Getting 60-80% of the rated figure in real shooting is normal.

YO LP-E17 camera battery render
Product render of the YO LP-E17 compatible battery: front label, rear LED charge indicator and USB-C port.

All three bodies share the same pack, but they do not spend it the same way. The R8 is full-frame, with heavier sensor readout and processor load; the R10 runs higher burst and readout speeds; the R50 is the most frugal, yet its screen and wireless module still draw. The same cell therefore behaves differently in each.

Official figures versus what you actually get

Body CIPA (LCD) CIPA (finder) Typical real range Continuous 4K
EOS R8 About 370 shots About 220 shots About 250-350 shots About 40-60 minutes
EOS R10 About 350-450 shots About 300-350 shots About 300-400 shots About 50-70 minutes
EOS R50 About 300-400 shots About 250-320 shots About 300-450 shots About 50-70 minutes

The real ranges come from everyday use: Wi-Fi on, long gaps between shots, constant review and cold weather all push toward the lower end, while a run-and-gun burst sequence with no reviewing can exceed the top. The official figures for the R10 and R50 differ slightly between regional pages, so go by the manual or the spec page rather than chasing single digits.

Note that the finder costs more than the LCD. On the R8 the two numbers differ by 150 shots, close to 40%. The reason is straightforward: the EVF is a small screen that stays lit, at high refresh and decent brightness. If you habitually hold the camera to your eye waiting for the moment, expect fewer frames than someone shooting off the screen.

How many packs to actually take

A simple way to estimate: divide the time you plan to shoot by the usable time per pack, then add one spare.

  • City walkaround, half day: 2 packs. One in the body, one in the bag, and no anxiety.
  • Full-day travel, mostly stills: 3 packs. At roughly 300 frames each, 900 covers a full day comfortably.
  • Event coverage with lots of bursts: 4 packs, and swap before the gauge reaches the last bar. Burst speed and review response both slow at low charge.
  • Video-first work with interviews or long takes: start at 4 packs and bring a PD-capable power bank. The R8, R10 and R50 all accept USB-C power, so you can record while plugged in — but a pack still has to be in the body.
  • Cold conditions: below freezing, bring 1.5 times the fair-weather count. Keep packs in an inside pocket rather than an outer one so they stay at a usable temperature.

If you regularly live-stream or record interviews from a fixed position, a dummy battery with an adapter is worth considering, along the lines of this NP-FZ100 dummy battery setup: an external DC supply replaces the pack and the runtime limit disappears. Build quality on LP-E17 dummy adapters varies, though, so confirm the output is 7.2V and properly regulated rather than buying a cheap adapter with drifting voltage.

Settings that genuinely save power

  1. Turn off automatic finder switching. This is the most overlooked item. Constant switching wakes both display paths. Locking to the LCD alone can add more than 10%.
  2. Disable Wi-Fi and Bluetooth. Stay in airplane mode when you are not transferring. Wireless standby draws more than most people expect.
  3. Shorten auto power-off. Set 30 seconds or 1 minute. A camera on standby is still driving the sensor and stabilisation; switching off beats half-sleeping.
  4. Lower screen brightness. Indoors, set it mid-range and raise it only outside. This has a very direct effect on runtime.
  5. Review less. Flicking through every few dozen frames is the real reason many people’s runtime shrank. During review the screen is at full brightness and the processor reads the card continuously.
  6. Turn off unnecessary correction and enhancement. Digital lens optimisation and highlight tone priority both consume processing headroom.
  7. Shoot video at 1080p or a lower frame rate. 4K 60p draws clearly more than 4K 25p, which in turn draws more than 1080p. For talking-head vlogging, 1080p 25p is entirely adequate.
  8. Do not shoot while charging in-body. Charging while shooting warms the pack and accelerates ageing over time. For long sessions, switch to a power-supply mode rather than a charging mode.

Together these usually stretch the usable time per pack by 20-30%. Compared with buying a high-capacity pack of unknown origin, adjusting settings is the more reliable gain.

How the three bodies differ

If runtime is your main pain point, one thing is worth knowing when choosing a body: the R8 has the lowest CIPA figure of the three, but it accepts USB-C power, so a power bank closes the gap; the R10 is the most efficient and suits long days away from an outlet; the R50 is the lightest, and one spare covers light travel.

If you plan to move up to a body like the R7 or R6 later, the pack changes to the LP-E6 family, with roughly double the capacity and a different set of priorities — the Canon LP-E6 battery section covers that in advance. There, sustained output matters most; here, capacity tiers matter most.

Carrying lithium-ion packs onto a flight has specific rules covering capacity, quantity and whether they must stay with you. If you travel for work often, read the guide to lithium battery rules for air travel first, so you are not forced to surrender packs at security.

FAQ

Can one R50 pack last a full day?

For light use, yes. At 300-400 frames, shooting two or three hundred images with occasional review and no Wi-Fi, a single pack can cover a day. But for a full day out travelling, reviewing as you go and transferring files, bring a second pack — it costs little and removes a lot of worry.

Why does a new pack drain so quickly?

Rule out three causes first: cold conditions, Wi-Fi and automatic finder switching left on, and a recent firmware update or long review session. If none applies, run a full charge and discharge to recalibrate. Only if it is still abnormal should you suspect the pack itself; the capacity tiers described in the LP-E17 section help you judge.

Can I charge the camera from a power bank?

Yes, with a PD-capable bank of adequate output and a USB-C to USB-C cable. With the camera on it supplies power; with the camera off it charges. Avoid charging while shooting in cold weather, since charging is limited or paused when the pack is too cold.

How should spare packs be stored long term?

Store at around half charge in a dry, cool place and top up every three to six months. Do not leave them full for months, and do not run them completely flat — both accelerate capacity loss. Before fitting, check that the contacts are clean and the casing is not swollen.

Posted on — Leave a comment

How Many NP-FZ100 Batteries Does a Wedding Day Need?

How many NP-FZ100 packs you need for a wedding comes down to two things: one body or two, and whether video is part of the job. Short answer first. A single body shooting mostly stills: 4–6 packs. Two bodies: 6–8 packs. Add ceremony and reception video and you want another 2–3 on top, or you move the main camera to a dummy battery and a power bank. The NP-FZ100 is rated at about 2280mAh / 7.2V / roughly 16.4Wh. Sony’s CIPA numbers usually sit in the 500–700 frame range, but a wedding means constant playback, long bursts and live view, so real days tend to land at roughly 60–80% of that. Build the plan around the discounted number and you won’t go flat during the ceremony.

YO NP-FZ100 camera battery render
Product render of the YO NP-FZ100 compatible battery: front label, rear LED charge indicator and USB-C port.

Where a wedding day actually spends power

Wedding power draw is not evenly spread. Knowing where the peaks sit helps more than simply throwing two more packs in the bag. The ceremony and the reception are the hungry parts. Travel gaps cost almost nothing — unless you leave the camera switched on, in which case standby quietly eats a meaningful slice of a pack.

Part of the day What you’re doing Draw Budget
Morning prep / pickup Constant wake-ups, bursts, playback and deleting Medium 1–2 packs
Ceremony Bursts for the key moments, some video High 1–2 packs
Portraits / location Live-view composition, repeated wake-ups Medium-high 1–2 packs
Reception Flash recycling, toasts in bursts High 1–2 packs
Transfers / gaps Standby or powered off Low Ignore

How long one NP-FZ100 lasts

The NP-FZ100 covers the A7 III, A7 IV, A7R IV, A7R V, the A9 series, the A1, A6600, A6700, A7C II and the FX3, among others. The same pack behaves differently in different bodies, so the table below gives broad, room-temperature, mixed-use ranges. Use them to plan, not as lab measurements.

Body Viewfinder (approx.) Rear screen (approx.) Continuous 4K (approx.)
A7 III / A7 IV 500–700 frames 400–600 frames 90–130 min
A7R IV / A7R V 450–650 frames 380–550 frames 80–120 min
A9 / A9 II 400–600 frames 350–500 frames 90–120 min
A7C / A7C II / A6700 400–600 frames 350–500 frames 80–120 min
FX3 / ZV-E1 — Video-first bodies Run external power

One trap worth repeating: the A6400, A6500, A7 II and A7R II run on NP-FW50, not the NP-FZ100. The two are not interchangeable. Confirm the body before you take the booking — the Sony mirrorless battery cross-reference covers this in full.

Battery counts for three setups

Setup 1 — one body, mostly stills: 4–6 packs

A standard day of prep, ceremony, portraits and reception tends to use 3–4 packs. Keep 1–2 as headroom for a schedule that runs long or a guest who asks for extra frames. If you’re also covering the pre-ceremony prep in full, move to the top of the range.

Setup 2 — two bodies, mostly stills: 6–8 packs

Two bodies usually means a wide on one and a long lens on the other, both working. At 3–4 packs each, that’s 6–8 in the bag. Number the packs per body so you can tell afterward which camera is the thirsty one.

Setup 3 — two bodies plus video: 8–10 packs, or external power

Video is where batteries disappear. Recording the full ceremony plus reception segments commonly costs 3–4 packs on one body alone. Rather than stacking packs, put a dummy battery and power bank on the main camera and keep the second body on NP-FZ100 for candids. The wiring is laid out in dummy battery and power adapter options.

When to swap: a rhythm that works

  • Swap at one bar. Don’t run a pack to automatic shutdown. By the last bar the voltage has already sagged, and both burst rate and flash recycle slow down.
  • Fresh pack before the ceremony, whatever is left. The ceremony happens once. Start it on a full battery.
  • Swap at transitions — portraits to reception, or between toast tables. Use the pause; don’t change mid-sequence.
  • Charge what comes out. Receptions usually have outlets within reach. Topping up as you shoot means the last pack or two isn’t dead on arrival.
  • Don’t mix packs of very different ages in the same body. A heavily worn pack tends to drop out suddenly under load.

Top-ups during the day

A dual-slot charger weighs less than the extra packs it replaces. Plug in during lunch or a transfer and you’ll refill 2–4 packs in a couple of hours. With a USB-powered charger, a large power bank works from the car too — just remember packs warm up while charging, so don’t leave them sealed inside a bag. For body settings that stretch each pack further, see the camera power-saving settings list.

The packing list

  • 4–10 NP-FZ100 packs, depending on the setup above
  • A number on every pack, so rotation is fair and wear is traceable
  • One or two dual-slot chargers, plus cables and plugs
  • A hard case or terminal covers, so contacts never meet keys or coins
  • 1–2 spares in an inside pocket; in cold weather, body heat is your battery warmer

Plan for enough plus one layer of headroom. Carrying far more than that only adds weight and sorting time. Money is usually better spent on a second charger than on two more packs.

FAQ

Are third-party packs reliable enough for weddings?

A well-made compatible pack is a legitimate alternative; matching the original on capacity and cycle life isn’t a stretch. Run one as a dry rehearsal over a full day’s worth of shooting to check burst and playback behavior, then put it on real jobs. For the big dates, most shooters still keep one genuine Sony pack — $70 and up — as a backstop.

Will two packs cover a wedding?

Usually not. A light, single-body, stills-only schedule might squeak through, but add bursts, playback or video and two packs rarely reach the end of the reception. Start at four.

Do I need more for a winter outdoor wedding?

Yes. Below freezing, capacity drops noticeably, and near -10°C you may see roughly half of room-temperature performance. Carry 1–2 extra, keep spares against your body and rotate them.

The camera says remaining charge can’t be displayed accurately — keep shooting?

Yes. It’s a common message on some Sony bodies with non-genuine packs. Power delivery and shooting are unaffected; only the percentage is approximate. “Cannot recognize this battery” is a different matter and needs troubleshooting.

Only need a spare? The NP-FZ100 2600mAh comes on its own, with a charger, or as a two-battery kit. Both versions hold 2600mAh; the USB-C one costs slightly more and saves you carrying a dock.

Posted on — Leave a comment

BC-W126S vs In-Camera USB-C Charging: 150 Minutes and the Real Limits

Short answer: the BC-W126S is Fujifilm’s desktop charger, AC 100–240V at 50/60Hz, supporting both NP-W126 and NP-W126S and filling an NP-W126S in about 150 minutes at +20°C. Because the X100VI, X-T50, X-E5, X-M5 and X half ship without a charger, there are three practical paths: buy the desktop charger, charge in-camera over USB-C with the power off, or use a cell with its own USB-C port. The most overlooked detail: Fujifilm states that in-body charging stops as soon as the camera is switched on.

Three charging paths compared

Path What you need Speed / condition Best for
BC-W126S desktop charger Charger plus mains socket About 150 minutes at +20°C; frees the camera Multiple cells rotated overnight
In-camera USB-C USB-C cable and adapter (cable supplied) Camera must be off; charging stops when powered on One-cell travel with minimal gear
Cell with built-in USB-C Direct-charge battery No camera or desktop charger needed Skipping the charger, older bodies without USB charging

The third path matters because the camera is not involved at all: pull the cell out, plug it into a power bank, and it charges. Our TNP-W126S direct-charge cell is rated 1050mAh, while the standard NP-W126S replacement is rated 1210mAh. Both fit the same bodies; only the charging inlet differs.

What the 150-minute figure actually means

About 150 minutes is Fujifilm’s rating at +20°C; the BC-W126 and BC-W126S are in the same range for their respective cells. It is not constant. Fujifilm gives a charging temperature range of +5–40°C and an operating range of 0–40°C, so charging in a cold car or after the camera has baked in the sun slows down or triggers protection. The original NP-W126S is rated 7.2V / 1260mAh with 8.4V maximum and about 47g — a modest cell, which is why 150 minutes is normal rather than slow.

Safety boundaries

Fujifilm’s compatibility chart adds three cautions: use a Fujifilm or correctly specified charger; an incompatible charger and battery combination can cause leakage, overheating or rupture; and in-body USB charging stops when the camera is switched on. The BC-W235 dual charger for the NP-W235 system needs a 15W+ PD adapter, but that belongs to a different battery family and its requirements should not be applied here.

Stop using any cell that swells, deforms or heats unusually. For long storage, Fujifilm recommends a dry place at +15–25°C rather than leaving a fully charged cell unused for months. More on heat and care is in the NP-W126S category.

Choosing by scenario

Scenario Suggestion
Shooting at home, already own a BC-W126 / BC-W126S Add a standard cell, keep the existing charging setup
Travelling with one new body One USB-C cable and off-camera hours, or a direct-charge cell
Two-day trip with three cells BC-W126S overnight rotation; rely on quantity, not fast charging
Older body (X-T1 / X-Pro2) without in-camera charging Desktop charger or a direct-charge cell

FAQ

Can I use a phone charger with the camera?

A correctly specified USB-C supply works, but keep the camera off. Fujifilm states that in-body charging stops when the camera is on, and recommends a compatible charger.

Will the BC-W126S charge a plain NP-W126?

Yes. The official specification supports both NP-W126 and NP-W126S; they fit the same cameras, with the S version optimised for higher-draw bodies.

Why does charging take longer than 150 minutes in winter?

That figure is measured at +20°C. The official charging range is +5–40°C, and cold lithium cells charge markedly slower or trigger protection.

Can I shoot while the USB cable is plugged in?

You can leave it connected, but charging will not continue. For continuous power, use a DC coupler and external supply rather than USB top-up while shooting.

Posted on — Leave a comment

NP-FZ100 (USB-C) Charging Times: Phone Charger, Bank, PD

Short answer: a NP-FZ100 (USB-C) takes roughly 5–7 hours on an old 5V/1A charger, 3.5–5 hours on a 5V/2A phone charger, 4–6 hours from a power bank, and 2.5–3.5 hours on an 18W-or-better PD charger. These are ranges rather than fixed figures, because the same pack’s charging time shifts noticeably with input power, cable quality, starting charge and ambient temperature. Below we go through the three supply types, and note when you should expect to fall outside those ranges.

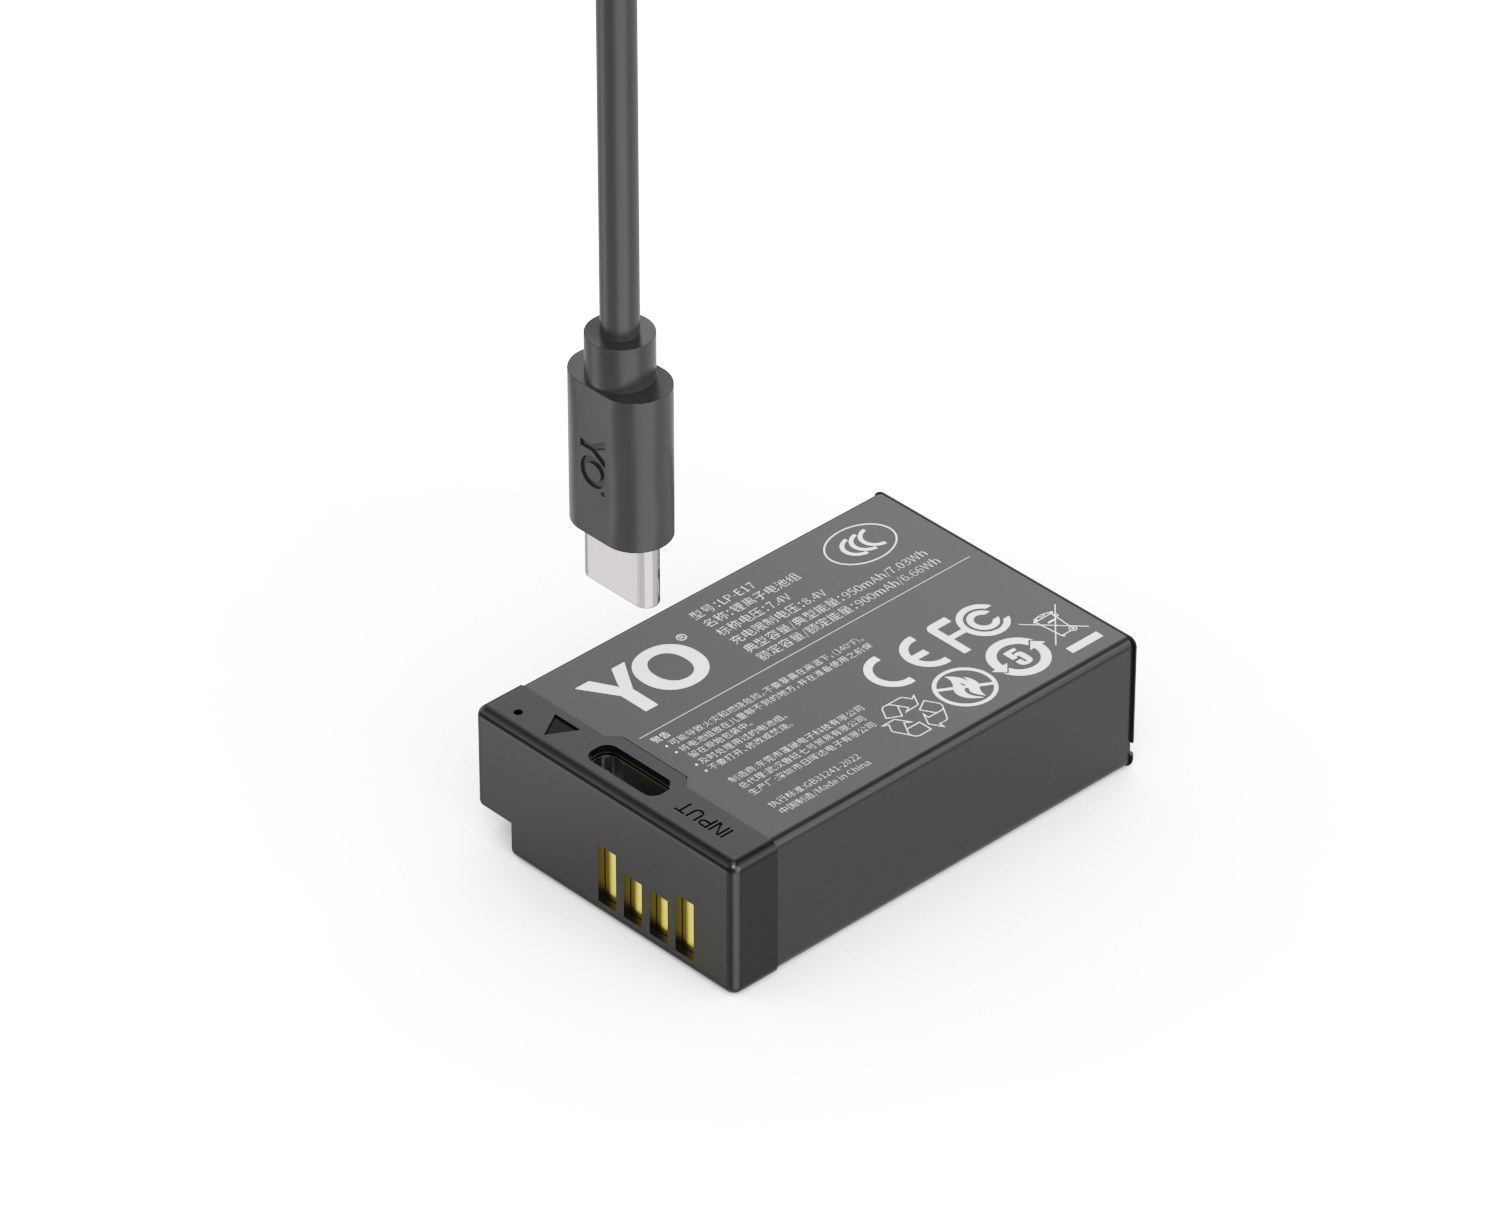
YO NP-FZ100 camera battery render
Product render of the YO NP-FZ100 compatible battery: front label, rear LED charge indicator and USB-C port.

First, the variables: why one pack can differ by a factor of two

The NP-FZ100’s rated energy is 19.24Wh (2600mAh / 7.2V). In theory a 10W input would fill it in two hours, but charging is not a constant-power process: constant current first, constant voltage later, and the final 20% often takes a third of the total time. How much current the charger can supply and how much the battery management chip will accept — the lower of the two is what sets the speed.

Three factors are commonly overlooked. The cable: losses in a poor USB-C cable drop the voltage that actually reaches the pack, and the charging chip reduces current in response. Temperature: below 10°C or above 40°C, most battery management schemes deliberately cut current to protect the cells. And charging while in use: if the pack is simultaneously powering the camera, the charging current is shared, and the time stretches accordingly.

Realistic time ranges for the three supply types

The table assumes charging from near empty to full, an ambient temperature of 20–25°C, and the supplied or a competent cable. The figures reflect the normal behaviour of USB-C direct-charge packs; individual units vary by tens of minutes.

Supply type Typical output Time to full Good for
Old phone charger 5V/1A About 5–7 hours Plug in overnight, take it in the morning
Standard phone fast charger 5V/2A About 3.5–5 hours Office or hotel room overnight
Power bank 5V/2.1A About 4–6 hours On location, in transit
PD charger 18W and above About 2.5–3.5 hours Fast top-up after a shoot, rotating several packs
Laptop USB-C port Around 5V/1.5A About 4–6 hours Charging while you work, without using a socket

Phone chargers: the tier people underestimate

Many of us still have a five-year-old 5V/1A charger in a drawer. It will charge the pack, but it will eat most of a day. If you need the battery first thing in the morning, plugging in overnight is fine; if you discover an empty pack at three in the afternoon and you are shooting at seven, this tier will not save you.

5V/2A is the value sweet spot

The 5V/2A charger bundled with most phones already brings the time down to around four hours, and the gap to a PD charger is far smaller than the price gap. For anyone with one or two packs and an unhurried schedule, this tier is enough, and there is no need to buy extra gear for fast charging.

Multi-port chargers share the power

Charge two packs and a phone at once from a three-way station and the total output is divided, each pack gets less current, and the times stretch proportionally. If you want speed, plug in separately; if you want to save sockets, accept slower charging. You cannot have both.

Power banks: portable, but count the conversion losses

A power bank is rated at 3.7V cell capacity. Getting that to 5V and then into the battery involves a boost conversion, and usable energy is typically only sixty to seventy percent of the nominal figure. From a 10,000mAh bank, two to three full charges of a 16.4Wh pack is a realistic expectation; do not divide the numbers and assume four.

Cold weather makes this worse. Below freezing the bank’s own output falls and the pack restricts charging current, so both sides are discounted at once and a four-hour charge can become six or more. Our notes on battery behaviour at low temperature have the detail, and are worth reading before a winter shoot.

PD chargers: fastest, but do not expect the full rating

The advantage of PD is that after negotiation it can supply a higher voltage, which reduces line losses and lets more power through. But a charger rated at 65W does not mean the battery will draw 65W — the charging chip on the battery side has a ceiling, and anything above it simply goes unused. In practice the gap between a 65W and a 30W charger on this pack is smaller than the numbers suggest.

The most practical way to find out how fast your combination really runs is to watch the indicator rhythm on the pack or the charging prompt on the camera, then time one charge from empty to full. One measurement beats any datasheet.

Planning top-ups when you rotate several packs

  1. Back at the hotel, put the empty pack on the PD charger first — do not wait until after your shower to remember.
  2. Charge the second on the 5V/2A charger at the same time, avoiding a multi-port split that would slow both.
  3. Leave the third for tomorrow and take it to about 80%; storing at full charge long term is unkind to cycle life.
  4. Check the power bank’s level before you leave, and in cold weather carry packs in an inside pocket rather than the outer pocket of the camera bag.
  5. On multi-day shoots, a dual-slot charging case handles two packs overnight in one go.

The point of this routine is not the shortest possible time but making “there is always one pack at full charge” a habit. No charging speed rescues the evening you forgot. For more on matching bodies and batteries, see the NP-FZ100 (USB-C) section.

FAQ

Why is my NP-FZ100 (USB-C) still not full after six hours?

Look at the charger first. An old 5V/1A unit takes five to seven hours by nature, which is normal. If you are already on a 2A-or-better supply and it is still slow, check whether the cable supports higher current, whether the plug is fully seated, and whether the ambient temperature is unusually low or high.

Can I use a phone fast charger without damaging the battery?

Yes. USB-C charging negotiates voltage and current first, and the pack only accepts the tiers it can handle, so a powerful charger cannot force current into it. The precondition is that the charger and cable are legitimate products; poor accessories are the real risk.

Does unplugging halfway through harm the battery?

No. Lithium cells have no memory effect, and partial charging is normal use. If anything, routinely running the pack to auto-shutdown before recharging is worse for cycle life.

Does charging while shooting make it slower?

Yes. The pack keeps discharging while the camera records, the charging current is shared, and the time stretches noticeably, with both the body and the pack getting warmer. For long takes it is better to keep a charged pack in rotation than to push on with a cable; the limits are set out in our FZ100 battery section.

Posted on — Leave a comment

Mixing a T Series Pack With an Original LP-E17: Rotation Rules

YO LP-E17 相机电池

Short answer: yes, you can mix them, and it will not damage the camera. The LP-E17 is a 7.2V, three-contact design, and the body reads voltage and temperature signals without caring whose name is on the label. The original at about 1040mAh and the T series tiers sit in the same range, so there is no electrical obstacle to using them together. What needs managing is not safety but the gauge jump that comes from two different discharge curves, and the rotation confusion that follows.

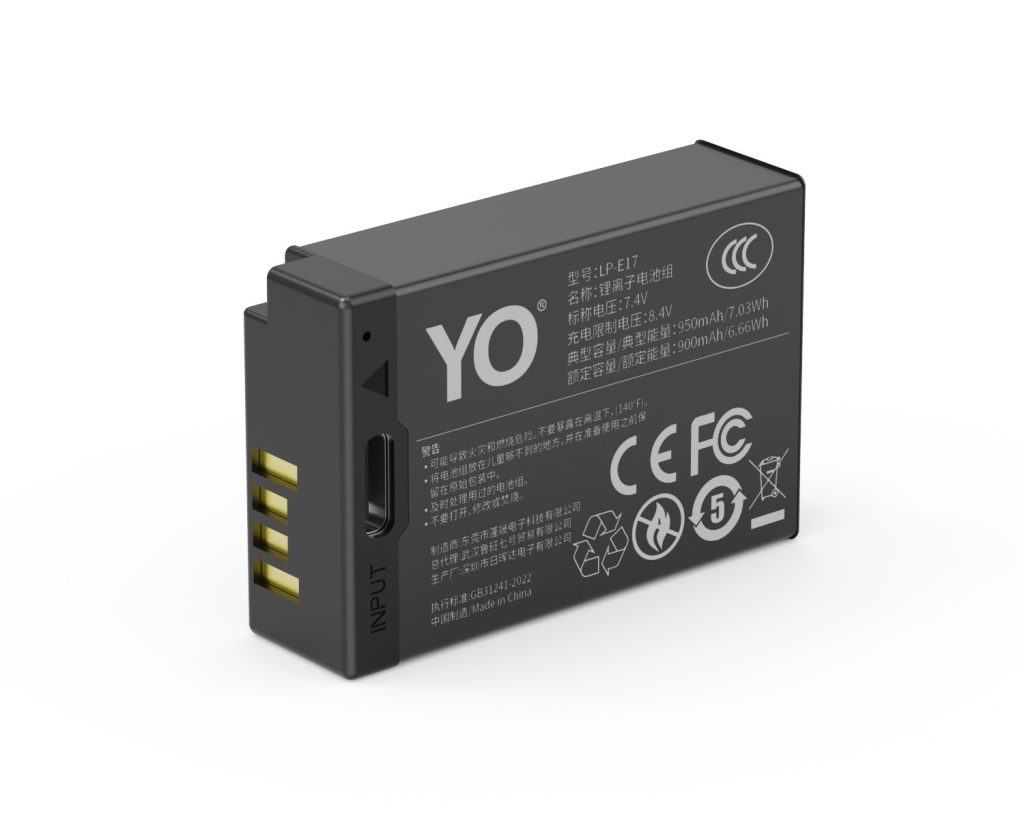
YO LP-E17 camera battery render
Product render of the YO LP-E17 compatible battery: front label, rear LED charge indicator and USB-C port.

The physical boundaries of mixing

The body and battery communicate over three contacts: positive, negative, and a data line. The data line carries temperature and identification, and the body uses it to set charging current and the low-battery threshold. If a third-party pack is recognized normally, that communication works and the voltage is within the allowed range.

The protection board is a second layer. A reputable product guards against overcharge, over-discharge, short circuit, and over-current, and those protections are the battery’s own last line of defense, independent of the body. In a mixed pair each pack looks after itself; there is no circuit path by which one drags the other down.

Chargers can be shared. The original LC-E17 judges the charging stage by voltage, so any pack of the same form factor can use it. The T series supports USB-C direct charging and needs no dock at all, and the two replenishment routes do not conflict. Whether a dock is needed or can be shared is a matter for the product documentation and the charger markings.

So the claim that mixing damages the camera does not hold when voltage matches, contacts match, and the protection board is intact. The cases that genuinely go wrong are mostly unbranded products that omitted the protection board, or contacts with loose dimensional tolerances causing poor connection. Those are quality problems, not mixing.

Basic rotation principles

The core tension in mixing is that the remaining-charge number shown by the body does not mean quite the same thing for both packs. At the same two bars, the original might still deliver two hundred frames while the T series has eighty. Rotation should be designed around that difference.

  1. Charge both fully before you leave. Do not start with one full and one half. Inconsistent starting points are the worst thing about mixing, because every later judgment is distorted.
  2. Fit the smaller-capacity pack first and keep the other in the bag. That way the second half of the day runs on the pack with more headroom, and the finish is calmer.
  3. Do not wait for auto-shutdown. Swap at one bar and treat the remainder as a buffer rather than usable quota.
  4. Mark the pack you just pulled immediately so it cannot be confused with a charged one. A rubber band, a sticker, or simply inserting it the other way round all work.
  5. Charge both fully before storing them after the trip. Mixing makes “I thought it still had charge” misjudgments more likely, and standardizing on full removes that variable.

If the two capacities are far apart, say a 750mAh paired with a 1050mAh, adjust the plan again: put the small pack in the low-intensity stretches such as travel between locations, scouting, or around meals, and save the large one for the main scenes where you know you need output.

Why the gauge jumps, and how to read it

The gauge usually runs two logics at once: one reads voltage, the other uses a coulomb counter. The voltage method is simple but crude, and the reading changes as soon as the load does. The coulomb counter is accurate but needs several full cycles to learn a given pack’s real capacity.

Fit a pack the body has not seen before and the counter starts blank, so the body falls back to voltage estimation and the reading is conservative. It converges over a few uses, but alternating two packs keeps interrupting the learning, so the reading never settles as well as with a single pack.

What that looks like: three bars on insertion, two after a few dozen frames, back to three after a power cycle, and a low-battery warning that arrives without much notice. None of this is a fault; it is the estimator switching between two batteries.

Symptom Cause What to do
Drops fast right after insertion, then steadies Voltage estimation; sag under load is pronounced Normal; watch the trend
Gauge recovers after a power cycle Voltage rebounds when the load is removed Trust the low-battery warning, not the bars
Shuts down abruptly at one bar High internal resistance; fast sag under load Move that pack to backup duty
The two packs lose bars at clearly different rates Differences in capacity and curve Rebuild the rotation around capacity

A useful rule: when mixing, do not trust the bars, trust how much you have already shot. Set yourself a threshold such as swapping after a certain number of frames, and it will be far more reliable than watching the gauge.

Three situations where mixing is not advised

A one-off shoot you cannot redo. Wedding ceremonies, product launches, single-event coverage: tolerance for error here is zero. Using packs of the same model, batch, and cycle count pushes the variables to a minimum. The money saved on a battery is not worth one extra risk.

Cold conditions. Below freezing, usable capacity is already reduced, and two packs on different curves will lose capacity by different amounts, which makes rotation judgments more error-prone. For cold-weather location work, standardize on one model and carry an extra.

Long video takes. Video is a continuous load that demands voltage stability at the tail. If the pack with higher internal resistance happens to be in the camera, it may cut out while the gauge still shows charge, leaving the file incompletely written.

Conversely, for street shooting, travel, and family recording, anything you can redo, mixing is entirely fine and lets you use both packs down. The most common pairing of an LP-E17 T series with an original is the original as primary and the T series as the runtime and recharge fallback, and the T series category covers those scenarios in more detail.

FAQ

Does mixing shorten the original battery’s life?

No. The two packs are electrically independent and there is no path for current to flow between them. The original’s life depends only on its own cycle count, temperature, and storage state.

Can the body tell a third-party battery from an original?

Most bodies read voltage and temperature and therefore work and charge normally. Some omit the genuine-battery notice for non-original packs, or do not show an exact percentage. That does not affect shooting; it just means less information on screen.

Can one charger handle both capacities?

Yes. A dock judges the charging stage by voltage, and capacity only affects how long a full charge takes. With USB-C direct charging the two are entirely independent. Check the markings on both charger and battery for specifics.

With long-term mixing, is periodic calibration needed?

It helps to give each pack a full cycle on its own every few months so the body’s coulomb counter can relearn it. It is not mandatory maintenance, but it keeps the display accurate. More on capacity and fitment is in the capacity and compatibility guide.

Posted on — Leave a comment

LP-E6NH Video Runtime on the R5 and R6 — Heat Comes First

Short answer: one LP-E6NH recording continuous 4K on an EOS R5 or R6 usually lasts somewhere around 60-90 minutes; but in most real shoots the body’s heat warning arrives before the pack runs flat, so what decides how long you can record is not how many batteries you carry, it is how you pace cooldowns. In other words, the goal of a battery plan is not “cover the whole day” but “always have a full pack ready to drop in the moment the camera has cooled enough to resume.”

YO LP-E6NH battery rating label
Rating label of the YO LP-E6NH battery: nominal voltage, typical capacity and safety certifications.

Below we break down where the power goes, the realistic duration ranges, the overheating mechanism, and a battery plan you can follow directly.

Where an R5 or R6 spends its power

The power profile of these two bodies is nothing like a DSLR. The pack is not drained by the shutter; it is drained by systems that run continuously.

  • Sensor and processor always on: a mirrorless camera has no optical finder, so it works from the moment it is switched on and draws current even at idle.
  • In-body stabilization: IBIS consumes a steady amount of power over long periods, and it is especially visible with handheld video.
  • Screen and viewfinder: a bright screen and a high-refresh EVF are commonly underestimated drains.
  • Encoding and writing: high bitrate, high frame rate, Log or RAW raises processor load and card-write power significantly.
  • Wireless and networking: keeping Wi-Fi or Bluetooth connected, or transferring while shooting, pulls current continuously.

That explains why the same LP-E6NH manages several hundred to a thousand-plus stills but only a bit over an hour of video — the power density is completely different.

How long it really lasts, by scenario

Canon’s figures are references under standard conditions; real shoots discount them by how you work. For common setups, these ranges are a reasonable guide:

Shooting scenario Approximate duration per LP-E6NH Main factors
1080p or low-bitrate 4K, room temperature, stabilization off, screen only About 80-100 minutes Bitrate, screen brightness
High-bitrate 4K, handheld with stabilization, room temperature About 60-80 minutes Stabilization, encoding load, temperature
4K high frame rate or Log, outdoors in summer About 45-70 minutes, often cut short by heat Cooling, frame rate, ambient temperature
Interval shooting or timelapse, long uptime Depends on total uptime, not shutter count Idle draw, screen-on time

These numbers are order-of-magnitude references, not promises. The same camera behaves differently at different room temperatures, firmware versions and card speeds, so your own body is the authority.

Why overheating always arrives before an empty pack

The R5 and R6 have to fit a full-frame sensor, five-axis stabilization and a cooling structure into one body, and during long high-bitrate takes heat accumulates faster than the pack drains. The sequence is familiar: a yellow temperature warning, then a shortened recording limit, then a forced stop.

Two consequences follow. First, carrying more batteries does not extend a single continuous take — it only extends the total you can record in a day. Second, how efficiently you cool the camera determines your actual output: putting it in shade with airflow, flipping out the screen, and keeping it out of direct sun adds more footage to the day than another battery does.

If you mainly shoot interviews or event coverage that needs long takes, consider holding each take to 20-30 minutes and covering with a second angle or in segments instead of running one continuous take. Segmentation also eases momentary load on the card and the pack.

A battery plan — rotating three packs

By a day’s shooting volume, two packs cover a light half day, and full-day event coverage is better served by three or more. The rotation can be as simple as this:

  1. Charge everything before you leave and number the packs 1/2/3. Numbers remove the “was this one full?” hesitation at the moment you swap.
  2. Keep one in the body and store the rest in the shade. In summer, do not leave them in the car or in a bag in direct sun; heat accelerates aging and worsens discharge behavior.
  3. Swap at about 20-30%, not at shutdown. The voltage sag at the end of a low pack undermines high-bitrate recording, and swapping early is safer than losing power mid-take.
  4. Do not charge a hot pack immediately. Waiting until it is near room temperature noticeably extends cycle life.
  5. Use a dock charger as your main top-up method. The body’s USB-C charging is for emergencies, and charging while recording adds heat.

For charger selection, see the dock comparisons in the LP-E6NH category; if there is a Sony body in your kit, the cross-system thinking in the notes on Sony FZ100 packs is useful, since the way capacity falls in the cold works the same way.

When to consider the LP-E6P instead

If you shoot an EOS R5 Mark II rather than an R5 or R6, the picture changes: that body asks for more sustained current, and while an LP-E6NH fits and works, some high-bitrate and high-speed burst modes may be limited. That is covered separately in the LP-E6P category — R5 and R6 owners do not need to switch packs over it.

As for third-party alternatives, brands such as YO typically land well below Canon pricing at the same LP-E6NH specification, which suits a third or fourth backup slot; keep Canon in the primary slot, especially for shoots in the cold or under long heavy load. Be aware that LP-E6+ is not a Canon designation — it is how some third parties (YO included) label an enhanced version, so its real capacity and discharge behavior vary by maker.

FAQ

One LP-E6NH gives me only about 40 minutes of 4K — is the pack faulty?

Check the conditions first: stabilization on, high bitrate or Log, a warm room, brightness at maximum. When all of these stack into the most demanding combination, 40-60 minutes is within normal range. Only if it is clearly shorter than a new pack under identical settings should you suspect degradation.

Can I record while charging from a power bank?

The R5 and R6 accept USB-C PD input, which can reduce internal drain during long recordings or interval work. But whether charging while recording works reliably, and how much power it needs, depends on the body model, firmware and charger protocol — check the body manual. Charging during heavy recording also adds heat, which can trigger the temperature limit sooner.

Are two packs enough for a full day of event coverage?

For light shooting, yes; for a full day of intensive video, no. As a rule of thumb, plan one pack per hour of continuous recording and keep one spare. If the budget is tight, buying one more third-party pack is better than propping things up with repeated in-body charging.

How should I store packs that go unused for a long time?

Store them at about half charge in a cool, dry place and top them up every few months. Long storage at full charge or at zero both accelerate capacity loss.